I'm going to assume that you've already read my two previous tutorials on user forms, namely:
The aim of this tutorial is to show you how to work with combo boxes, list boxes and the like.
A Souped-Up Drink Order Form
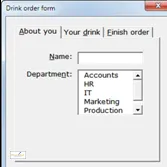
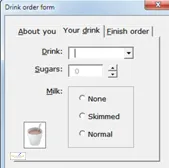
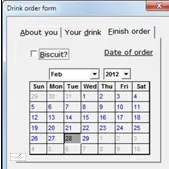
The examples in this tutorial will all refer to the following form:
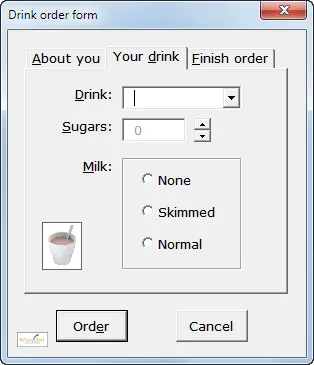
One of the three pages of the form is shown here.
You can download the workbook containing this example user form, complete with all the attached code.
Creating a MultiPage Control
A multipage control allows you to get lots of information into a single form:
A TabStrip control, by contrast, is useless - for a TabStrip every "page" of the form contains the same boxes, so they can only be used to display records from a table.
Make sure that you use the MultiPage (not the TabStrip) control!
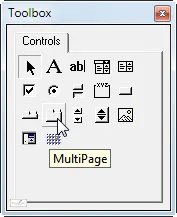
Click on the MultiPage tool, and click where you want it to go on your form.
You can then insert, move, rename and delete pages using the right mouse button:
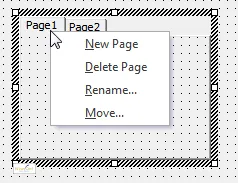
Right-click on the page tabs at the top of the control to add new pages or rename or move existing ones in a fairly obvious way.
How MultiPage Controls Work
In a multipage control, if you paste or add a control onto a page, it belongs to that page; otherwise, it belongs to the form:
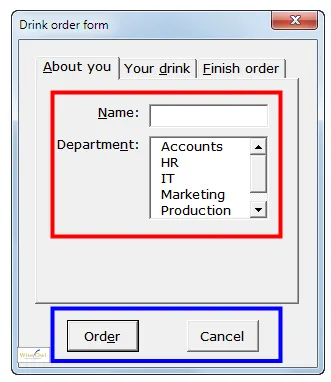
In this form:
Each page of a multipage control has its own tab order:
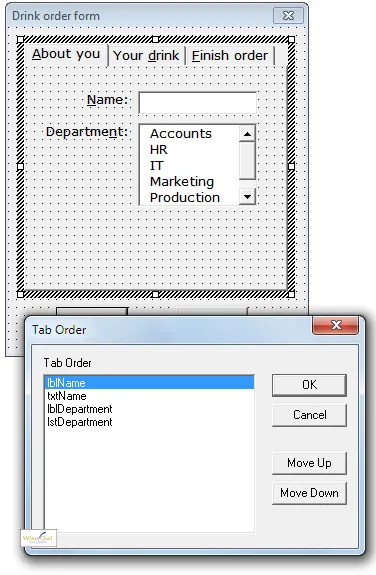
Here we're looking at the tab order for the About you page of the multipage control. The other pages will have their own tab orders.
Setting Focus to a Control on a Multipage
The only slight complication with a multipage is going to a control on it. You do this - surprisingly - by setting the Value property of the MultiPage:
If Len(Me.txtName.Text) = 0 Then
MultiPage1.Value = 0
Me.txtName.SetFocus
MsgBox "You must say who is ordering drink!"
Exit Sub
End If
In the code above, the line:
makes the first page of the multipage the current one (the pages are numbered from 0). Without it, the line:
would crash the macro, because you can't go to a control which isn't on the active page of the MultiPage.
Advantages of Combo Boxes and List Boxes
Combo boxes and list boxes work in almost exactly the same way in user forms. Here's an example of each:
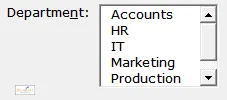 | 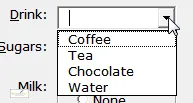 |
Example of a listbox | Example of a combo box |
Combo boxes have two advantages over a listbox:
They take up less room on a form.
They allow you to use predictive text (when you type in Ch in the combo box above, it would take you to the item Chocolate). You can only search in a listbox by the first letter of each item.
On the other hand, listboxes allow you to choose several items at once, which combo boxes don't allow.
Use combo boxes (or listboxes) wherever possible on a user form, since it makes validating data so much easier, as a user is restricted to a set of choices.
Populating the Rows of a Combo Box - the Easy Way
There are two ways to do this: by setting the RowSource property, or in code. The first way is easier! First create a range of the possible values for a combo or listbox:
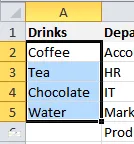
This range is called Drinks, and contains all possible choices (here's more on how range names work).
You should then select the combo or list box:

Select the combo or list box to change its properties.
Finally, you can type the name of the range as the RowSource for the combo or listbox:
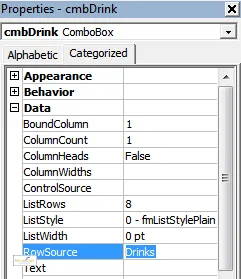
Note that you have to type in the range name - this is one of the only times in Excel where you can not press the F3 key to bring up a list of possible names. The reason for this, of course, is that you're not in Excel, but in the separate UserForms application.
You don't have to wait till you run the form to see the results - you can click on the drop arrow of a combo while designing your view to see the values listed.
Populating the Rows of a Combo Box - the Hard Way
There will be times when it's more convenient to add items to a combo or list box using code - here is a sample which would produce the following combo box:
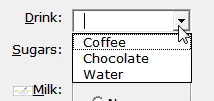
We'll add in the items in the Drinks range above one by one, then remove the tea.
Here is the code to do this, which will run whenever you load the form:
Private Sub UserForm_Initialize()
cmbDrink.Clear
Dim DrinkRange As Range
Dim DrinkCell As Range
Set DrinkRange = Range("Drinks")
For Each DrinkCell In DrinkRange
cmbDrink.AddItem DrinkCell.Value
Next DrinkCell
Me.cmbDrink.RemoveItem (1)
End Sub
Note that you can't mix and match: if you've set a RowSource property, the code above will crash with an unspecified error!
Returning the Value of a Combo Box or List Box
You can use either the Text or the Value properties of a combo or list box to find out what the user chose (the difference only becomes apparent when you use multi-column lists, as shown in the next part of this tutorial). For example:
If Len(Me.cmbDrink.Text) = 0 Then
MultiPage1.Value = 1
Me.cmbDrink.SetFocus
MsgBox "You must specify a drink!"
Exit Sub
End If
In the code above, we look at the number of characters in the drink chosen in the combo box, using the Text property.
Why Use a Multi-Column List
It can sometimes be useful to display one thing in a combo or list box, but store another. Here's a case study where we want to get the id field of the person ordering a drink, but display the name:
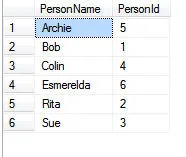
We have a list of records from a database query or view, and want to allow a user to choose a person.
We want to be able to choose by name, but store by number:
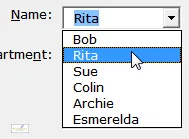 |  |
You choose the person ... | ... but store the name |
Combobox or Listbox Properties for Multiple Columns
To get our example above to work you need to set some properties of the combo or list box:
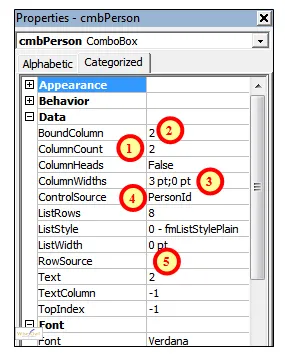
We'll need to set the numbered properties shown above.
On a rainy afternoon, you could try playing about with the ColumnHeads, ListRows and ListStyle properties to see how they affect how the combo or list box looks.
Here's what the numbered properties are used for:
Number | Property | Use |
|---|
1 | ColumnCount | Most combo boxes and lists have two columns |
2 | BoundColumn | Which is the column whose value subsequent code will refer to (this is usually an id number) |
3 | ColumnWidths | The width of each column in centimetres, separate by semi-colons (it's usual to hide the bound column and just display the text one) |
4 | ControlSource | Which range name in Excel will receive the value chosen |
5 | RowSource | Where the combo or list box will get its values from |
Writing Code to Populate the Combo or List Box
Having created a combo (or list) box and set its main properties as above, you can now use ADO code to get the underlying records and add them into the list of possible values. Here's an example:
Private Sub UserForm_Initialize()
Dim cn As New ADODB.Connection
cn.ConnectionString = "driver={SQL Server};" & _
"Server=ANDYB\SQL2008R2;Database=Movies;Trusted_Connection=True;"
cn.Open
Dim rs As New ADODB.Recordset
rs.Open "vwPerson", cn
cmbPerson.Clear
Dim NumPeople As Integer
NumPeople = 0
Do Until rs.EOF
NumPeople = NumPeople + 1
cmbPerson.AddItem
cmbPerson.List(NumPeople - 1, 0) = rs("PersonName")
cmbPerson.List(NumPeople - 1, 1) = rs("PersonId")
rs.MoveNext
Loop
rs.Close
cn.Close
End Sub
Notice that you add each item to the list, and then set the values for the item's first and second columns (ie the person's name and id).
Making a ListBox Multi-Select
The previous two parts of this tutorial have considered general features for combo and list boxes, but there is one thing you can do with a listbox that you can't do with a combo box: allow a user to select lots of records at the same time. To do this, first make your listbox multi-select:
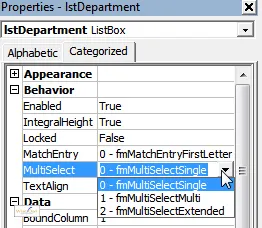
You can choose 3 possible values for a MultiSelect listbox. The difference between frmMultiSelectMulti and frmMultiSelectExtended (who thinks up these names?) is that with the latter you can click and drag to select lots of adjacent items at the same time.
You can then click on any item to select (or deselect) it:
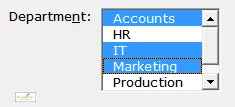
Here we have selected at least 3 departments (more may be shown selected if we scroll down).
Picking Up on Items Selected in Code
You can loop over the items in the Selected array to find out which items were chosen:
Private Sub btnOrder_Click()
Dim EachDepartment As Long
For EachDepartment = 1 To Me.lstDepartment.ListCount
If Me.lstDepartment.Selected(EachDepartment - 1) = True Then
Debug.Print Me.lstDepartment.List(EachDepartment - 1)
End If
Next EachDepartment
End Sub
Notice here that the ListCount property gives the number of items in the list (numbered from 1), but the Selected array is numbered from 0.
Spin Buttons
SpinButtons at first glance look clunky and unnecessary:

The SpinButton allows the user to change the number of sugars ordered.
However, the reason that they are so useful is that they allow you to prevent users typing in numbers directly:
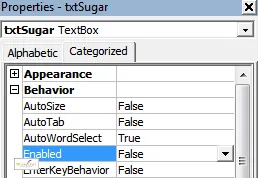
The textbox for the number of sugars has the Enabled property set to False - this means that a user can't change the value directly.
If a user can't type in a number directly, you don't have to validate its data type or values. This is a big advantage!
To create a SpinButton, just click on the tool and then click where you want it to go:
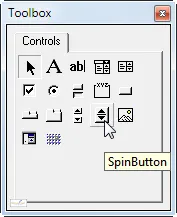
Don't confuse the SpinButton tool with the scroll bar tool ...
A SpinButton usually sits next to the textbox whose value it will affect:

Here the SpinButton will control the value in the txtSugar textbox.
That's the easy part. When you double-click on the SpinButton to write code, you get an odd default event:
Private Sub spnSugar_Change()
End Sub
It's more likely that you would attach code to the SpinDown and SpinUp events.
Writing a Generic Procedure to Handle Spinning Up and Down
It's good programming practice to write a single procedure to handle both possible spin directions. For our example, this could be:
Sub AddSugar(NumberAdd As Integer)
Dim CurrentSugars As Integer
CurrentSugars = CInt(Me.txtSugar.Text)
CurrentSugars = CurrentSugars + NumberAdd
txtSugar.Text = IIf(CurrentSugars > 0, CurrentSugars, 0)
End Sub
Here we'll pass in the number of sugars to add (this can be negative). The routine makes sure that you don't set the number of sugars to be less than 0.
Attaching Code to the SpinButton Events
If you've written a generic procedure as above, you just need to call it twice - once when you spin up, and once when you spin down:
Private Sub spnSugar_SpinDown()
AddSugar -1
End Sub
Private Sub spnSugar_SpinUp()
AddSugar 1
End Sub
When you click on the down arrow of the SpinButton, for example, it will call the AddSugar routine to add -1 sugars.
Adding CheckBoxes
A check box can have two possible values: True or False.

You either do want a biscuit, or you don't!
To add a checkbox to a form, use the CheckBox tool:
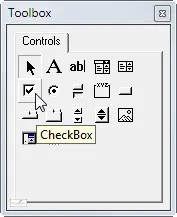
Click on the CheckBox tool to add it to a form.
Formatting a CheckBox
A checkbox comes with associated text, which can appear either to the right or left of the box itself:
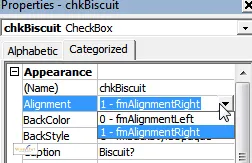
The Alignment property doesn't align the text within its container, but instead specified whether it should appear to the right or left of the tick box.
To show how this works, consider a check box with the following properties:
Property | Value |
|---|
Alignment | 0 - frmAlignmentLeft |
TextAlign | 1 - frmTextAlignRight |
Here's what this would look like:

The text appears to the right of the tick box, but is left aligned.
Picking Up on a Checkbox's Value
The Value property of a checkbox tells you whether it has been ticked or not:
ActiveCell.Offset(0, 5).Value = IIf(Me.chkBiscuit, "Yes", "No")
This is short-hand for:
If Me.chkBiscuit = True Then
ActiveCell.Offset(0, 5).Value = "Yes"
Else
ActiveCell.Offset(0, 5).Value = "No"
End If
If you set a checkbox's Tristate property to True (not the default) it can - as the name suggests - have 3 possible values, according to whether it is ticked, unticked or left null (in which case it would appear shaded). I can't help feeling you'd be better off with a combobox instead, however!
Option Buttons
An option button (sometimes called a radio button) allows you to choose between mutually exclusive possibilities:
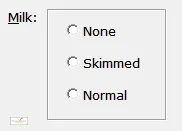
You can have no milk, skimmed or normal milk, but you must choose one and one only possibility.
I'd avoid option buttons like the plague: a combo box is easier to create, and makes it much easier to add additional options that you've forgotten (semi-skimmed milk, anyone?). I've only included this page because some clients or managers will ask for option buttons!
In a group of option buttons, each one can be True or False, but at any one time only one button can be True:
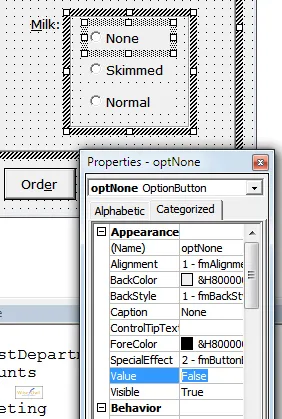
Here the OptNone option button has a value of False initially. As soon as you select None as your milk choice - and thereby set the value of OptNone to True - the value of the other option buttons in the frame will automatically be set to False.
Adding Option Buttons using a Frame
There are two ways to add option buttons: either as part of a frame, or as part of an option group. To add option buttons to a frame, first add the frame:
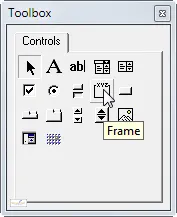 | 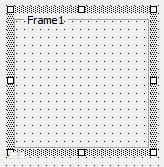 |
Click on the Frame tool ... | ... to add a frame |
You can then click on the option button tool to add buttons to the frame one by one:
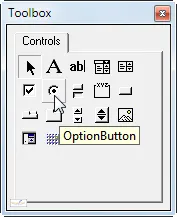 | 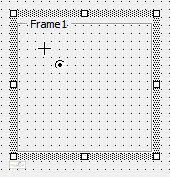 |
Click on the option button ... | ... then click inside the frame |
It's a good idea to rename your option buttons once you've added them: I've called the ones above OptNone, OptSkimmed and OptNormal.
Adding Option Buttons in a Group
Option buttons don't have to belong to a group. Instead, you can add the option buttons to a form, then set their GroupName property:
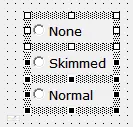
Select the option buttons to change their GroupName property (or you can set it for each button individually).
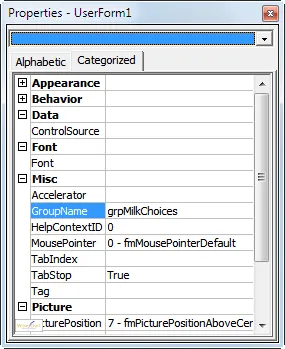
Type in a value for the GroupName property (here we've set it to grpMilkChoices). Because no other option buttons use the same group name, the buttons will automatically now cancel each other when clicked.
There's no great advantage that I can think of to using a frame or using grouped buttons - maybe it's down to personal preference!
Coding Option Buttons
The code to manage option buttons can be a bit messy. Here's our example code:
Dim MilkChoice As String
If Me.optNone Then
MilkChoice = "None"
ElseIf Me.optSkimmed Then
MilkChoice = "Skimmed"
ElseIf Me.optNormal Then
MilkChoice = "Normal"
Else
MilkChoice = "N/A2"
End If
ActiveCell.Offset(0, 4).Value = MilkChoice
Adding another option button is not only going to mess up the form, but also require more lines of code. Like I say - combo boxes are easier!
And with that, I've reached the end of this tutorial on advanced controls!
If you're wondering why I haven't included anything on the ToggleButton, ScrollBar or RefEdit controls, it's because I don't see the point in them. I'm willing to be persuaded otherwise by comments posted on this tutorial ...


