Configuring Power BI Report Server
This part of the blog assumes that you've finished installing the Power BI
Report Server software and are ready to configure your new report server.
You'll need an instance of SQL Server Database Engine in order to configure
your Power BI Report Server. You can learn how to install SQL Server using
the videos listed
here.
Opening Power BI Report Server Configuration Manager
To begin configuring your report server you'll need to open the Report Server
Configuration Manager application. This tool is installed during the
installation of Power BI Report Server and you should be able to find it in your
Start menu:

You can find the tool in the
Microsoft Power BI Report Server folder in the Start menu.
Click the option shown above to launch the tool.
Users of SQL Server Reporting Services should beware that this tool is not
the same as the Reporting Services Configuration Manager. Take care to
open the correct application!
When the Report Server Configuration Manager application opens you'll be
asked to connect to an instance of Power BI Report Server:
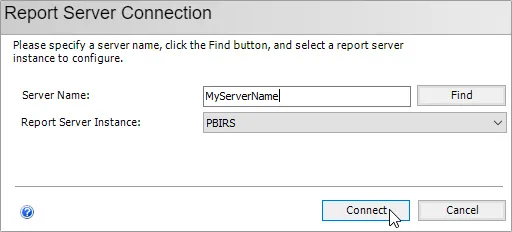
The default name of the Power BI Report Server is
PBIRS. Click Connect to connect to it.
When the connection has been established you'll be provided with many options
for configuring your report server:
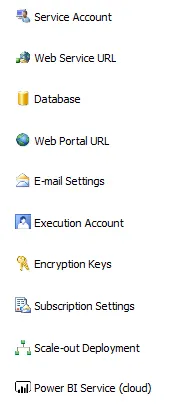
The menu on the left allows you to configure various aspects of your report server. In order to start publishing and viewing reports we need to configure three features:
- Web Service URL
- Database
- Web Portal URL
Configuring
the Web Service URL
Select the Web Service URL option in the menu on the left:

Select this option in the menu.
Complete this page of the configuration manager as shown in the diagram below:
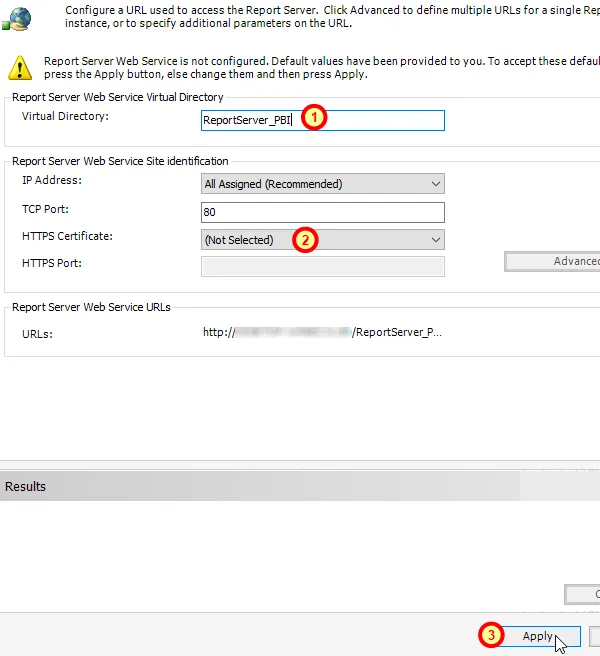
Follow the numbered instructions shown below this diagram.
- Enter a name for the Web Service Virtual Directory.
The default name is ReportServer. We're using
the name ReportServer_PBI for this example.
- You can optionally configure a SSL Certificate in this
section although we're opting not to do so in this example.
You can learn more about this
here.
- Click Apply to commit your choices.
You can see the results appear at the bottom of the screen:
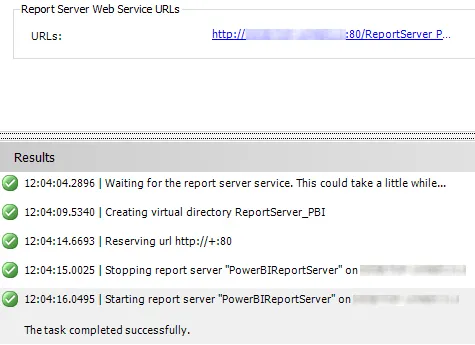
You can see the URL and results at the bottom of the configuration manager screen.
Configuring the Database
Power BI Report Server needs a SQL Server database to store the content
published to the report server. To configure this database, select
the Database page from the menu on the left of the screen:

Select this
option.
Click the Change Database button to select the database the
report server will use:

Click the button shown here.
You can choose to create a new database or pick an existing one. In our
example we'll create a new report server database:
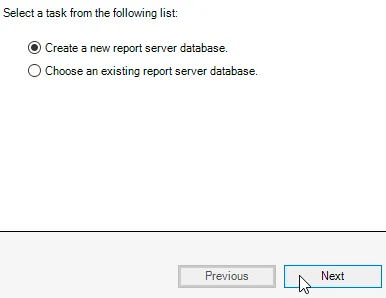
Choose the option shown here and click
Next.
Choose which instance of SQL Server Database Engine you'd like to create the
database in, then click Next:
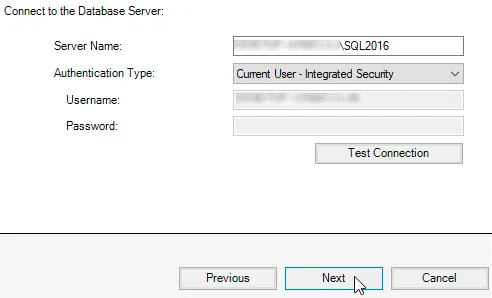
Hopefully you've installed an instance of SQL Server by this point!
Enter a name for the database and then click Next.
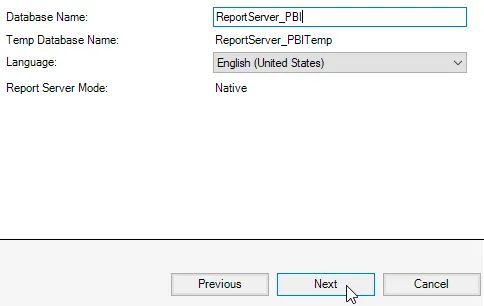
We're using the name
ReportServer_PBI.
Choose an account
to connect to the report server database and then click Next.
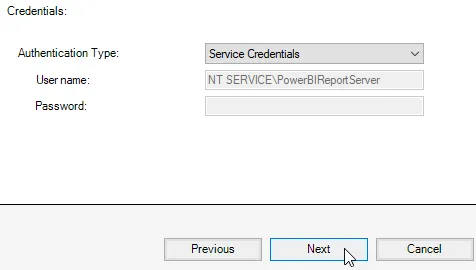
Choose an account then click
Next.
Read the summary then click
Next to create the new database.
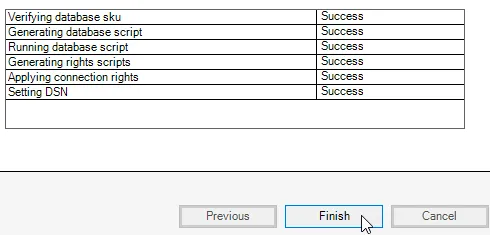
Assuming everything worked you should see this screen. Click
Finish to end the wizard.
Your
report server now has a database associated with it!

You can change the database used by the report server
at any point by following the same process.
Configuring the Web Portal URL
The Web Portal is the tool you will use to view the content that you have
saved to the Power BI Report Server. To configure this, click the
Web Portal URL option in the menu on the left:

Click the option shown here.
Enter a name for the virtual directory (here we're using Reports_PBI) and
then click the Apply button at the bottom of the page:
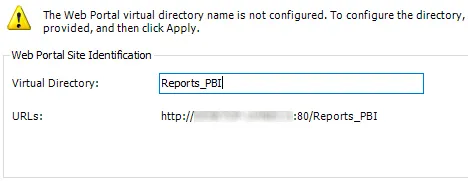
Enter a name in the box provided.
When the process has finished you'll be provided with a link to the Report
Server Web Portal:

You can click the link to open the Web Portal in your default browser.
The Power BI Report Server Web Portal
You can navigate to the Web Portal using the URL you created in the previous
section:
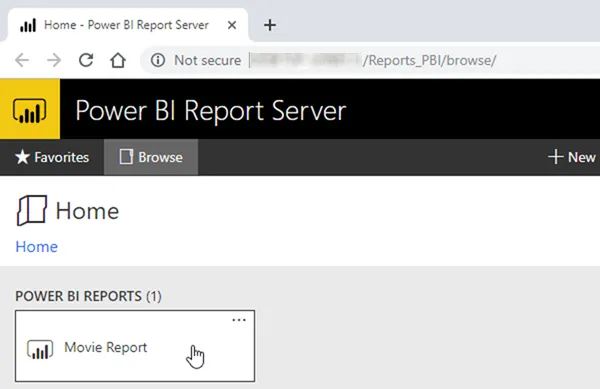
In
this example we have saved a single Power BI report to the
report server. You'll learn how to do this in the next
part of this blog series. You can click on a report to
open it in the Web Portal.
The Web Portal runs in a web browser and allows you to access content that you have published to the Power BI Report Server.
Users of SQL Server Reporting Services should note that you can also deploy
SSRS reports, as well as KPIs and SQL Server Mobile Reports to the Power BI
Report Server.
In order to create and save Power BI reports to a Power BI Report Server
you'll need a special version of the Power BI Desktop application. The
next part of this blog series explains how to install and use this application.


