Online Training Equipment Setup Guide
This guide provides a few hints and tips for setting up your equipment ready
for a Wise Owl online training course.

Some of the instructions below refer to the "Windows key" - this is what it looks like! It's usually at the bottom left of your keyboard.
Setting up a second screen
You can use a computer monitor or a TV as a second screen (we'll assume
that you've managed to plug it into your computer already). The next thing
you need to do is choose what to display on the second screen. To do this you can hold the Windows key and press P
on your keyboard.
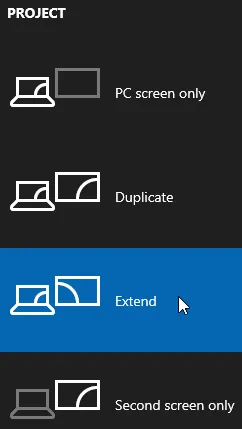
You can then choose how the second screen should behave. Choose
Extend so that your display will be spread across both screens.
Another way to do this is to right-click on the background of your desktop and
choose Display settings:

Right-click on the desktop and choose
this option to change how your screen displays.
You can then scroll down to the Multiple displays section to
choose how your screens should behave:
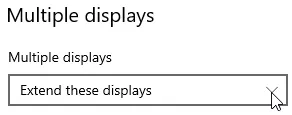
Choose
Extend these displays from the drop down list.
Setting the position of a second screen
When you extend your display across two screens you can click and drag things
from one screen to another. You can tell Windows where your second
screen is positioned relative to your main screen, to control the direction in
which you need to drag.
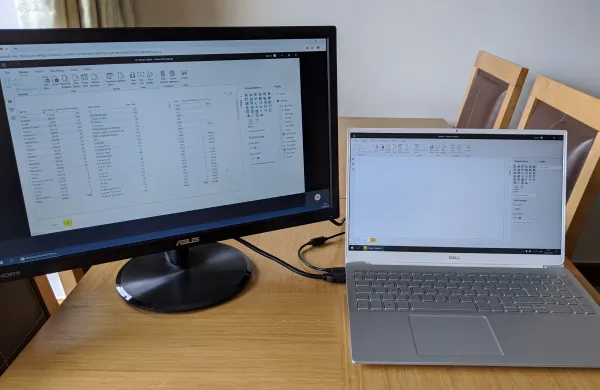
Here I've placed my second screen to the left of my main screen.
To set the position of your second screen, right-click on the background of your
desktop and choose Display settings:

Right-click on the desktop and choose this option to change
how your screen displays.
The dialog box will show you where Windows thinks each screen is:
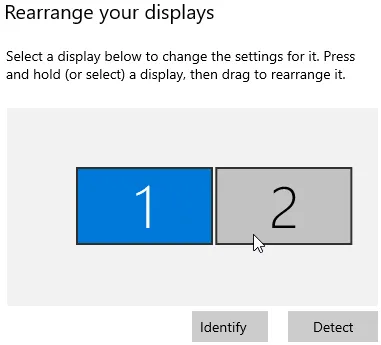
Windows thinks that the second screen is on the right of the first screen.
If you're not sure which screen is 1 and which is 2,
click Identify to make the number appear on each screen.
You can then position your displays by clicking and dragging to move them:
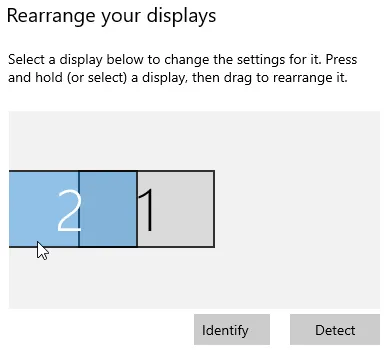
Drag either screen to reposition it.
When each screen is in the correct position, click Apply to
confirm your changes:
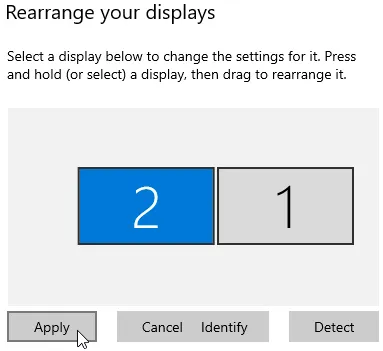
Click
Apply to confirm the new screen positions.
If you've done this correctly, you should now be able to drag things from one
screen to the other in the correct direction:
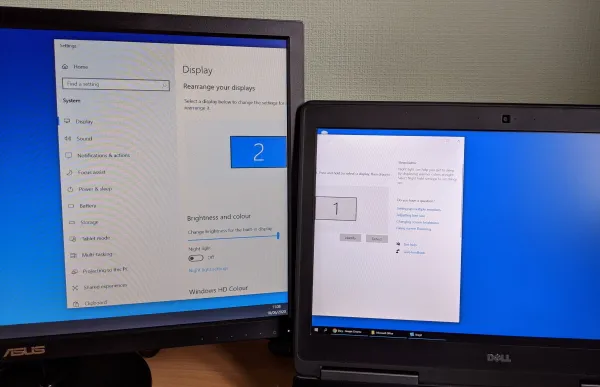
Click and drag to move windows from one screen to another.
Changing scale and layout settings for a second screen
To change scale and layout settings for a second screen, right-click on the
background of your desktop and choose Display settings:

Once more, you can right-click on the desktop to change how
your second screen appears.
Click on the screen whose settings you want to change:
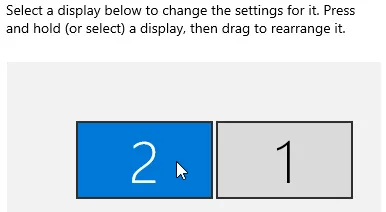
Make sure you've clicked on the
number representing the screen whose settings you want to change.
You can then scroll down to the Scale and layout section of the
window to change various settings:
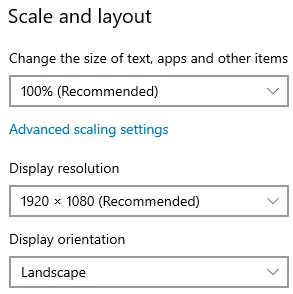
You can use the recommended settings or choose other options from the drop down lists.
Choosing which speakers to use
If you have multiple devices which can play sounds plugged in to your
computer, you might need to choose which one you want to use. One way to
do this is to click the speaker icon in the bottom-right corner of your screen:
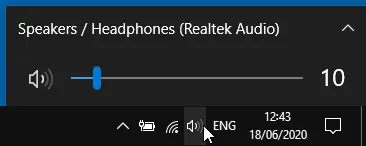
Click the speaker icon in the system tray in the bottom-right of the screen.
The currently selected playback device will be shown above the volume control.
You can click this to see a list of other options:
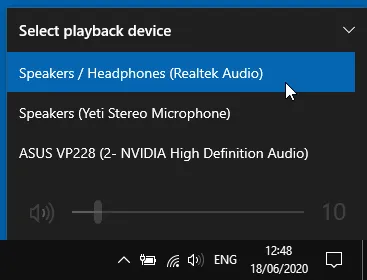
Choose the name of any device to set it as the current playback device.
When you plug an extra screen into your computer, Windows will often set it
to be the current playback device. If you find that your speakers suddenly
stop working, check which playback device Windows is currently using.
You can also choose a playback device by right-clicking:
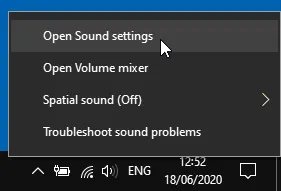
Right-click the speaker
icon and choose Open Sound settings.
You can then choose a playback device in the Output section of
the window:
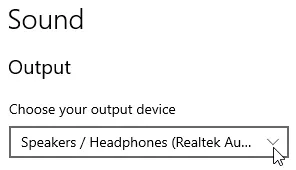
Use the drop down list to select an output device.
Choosing which microphone to use
If you have multiple microphones available on your computer you may need to
choose which one you want to use. Typically this is necessary when you
plug an external microphone or headset into a laptop which has a built-in
microphone. To do this, right-click the speaker icon:
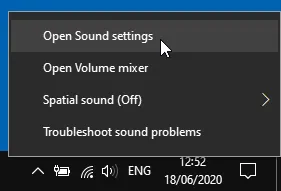
Right-click the speaker icon and choose
Open Sound settings.
You can then scroll down to the Input section and choose which
microphone to use:
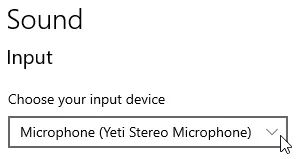
Choose which microphone to use from the drop down list.
Choosing sound settings when joining a Teams meeting
When you join a Microsoft Teams meeting you'll have the opportunity to choose
which audio and video devices you'll use, and whether to enable or disable them
before entering the meeting room.

The buttons shown below your name from left to right allow you to toggle the camera,
toggle the microphone and see device settings.
If you click the Devices button shown above, you can choose
which devices you want to use in the Teams meeting:
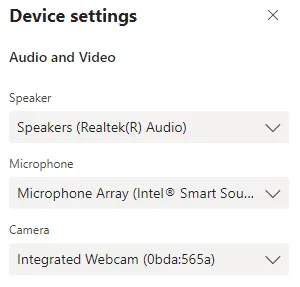
This panel appears on the right of the screen when you click
Devices.
Choosing sound settings while in a Teams meeting
When you're in the Teams meeting you can control your audio and video devices
using the Teams menu bar. The menu bar appears when you move the mouse
cursor over the Teams window.

The left-most button on the menu bar allows you to toggle your camera.
You can use the second button to toggle your microphone.

Click the second button on the menu bar to mute and unmute your microphone.
This is useful if you have crunchy snacks!
You can
see other sound settings by clicking the ...
button on the menu bar.
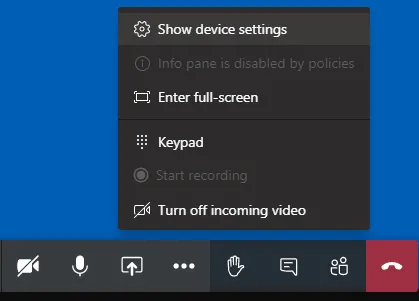
Choose
Show device settings to choose different audio and video devices.
Web browser settings
If you're using the browser version of Teams you can control some settings
using the web browser.
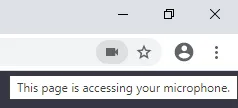
In Google Chrome the camera icon next to the star indicates that the page is using at least one of your devices. Hover the mouse cursor over the icon to see which devices are being used.
You can click the camera icon to change device settings:
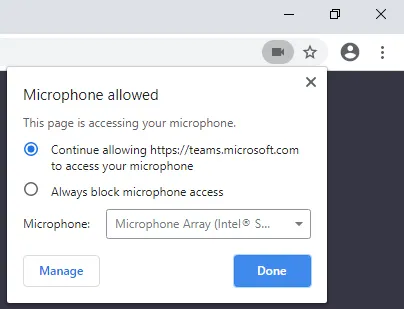
You can choose whether to block or allow devices and use the drop down list to select which device to use.
You may see an icon indicating that the web page has been muted:
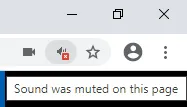
This icon appears in between the camera and star icons at the top-right of the browser.
You can click the icon to choose what to do:
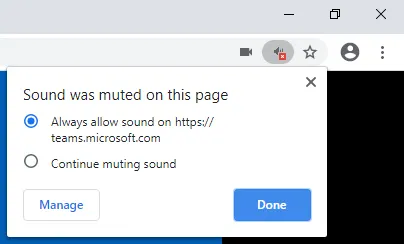
Click the icon and choose
whether or not to allow sounds.
You can also
right-click the browser tab and choose to unmute it:
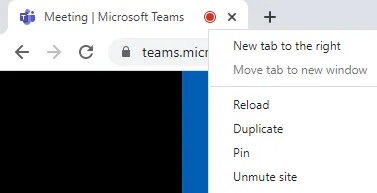
Right-click the tab and choose
Unmute site.
Troubleshooting
If you're having trouble with any of your equipment here are various
places you can visit to get help:


