Read our blogs, tips and tutorials
Try our exercises or test your skills
Watch our tutorial videos or shorts
Take a self-paced course
Read our recent newsletters
License our courseware
Book expert consultancy
Buy our publications
Get help in using our site
546 attributed reviews in the last 3 years
Refreshingly small course sizes
Outstandingly good courseware
Whizzy online classrooms
Wise Owl trainers only (no freelancers)
Almost no cancellations
We have genuine integrity
We invoice after training
Review 30+ years of Wise Owl
View our top 100 clients
Search our website
We also send out useful tips in a monthly email newsletter ...
Sending Christmas emails automatically with a Power Automate flow |
---|
Now that Microsoft have finally ironed out most of the bugs from the new flow designer in Power Automate, we thought we'd share this blog on how to automate your email Christmas card procedure! |
In this blog
It's December, which must mean: time to send out your Christmas corporate email! Below is a way to do this using a Power Automate flow - each recipient will receive this tasteful picture:
The card we'll send out, as created by ChatGPT.
This blog is to commemorate the fact that the new flow designer in Power Automate (well, newish now) is now finally more or less bug free (and also to celebrate the fact that we've felt free now to update all 202 pages of our Power Automate courseware from the classic to the new flow designer - a not insignificant task).
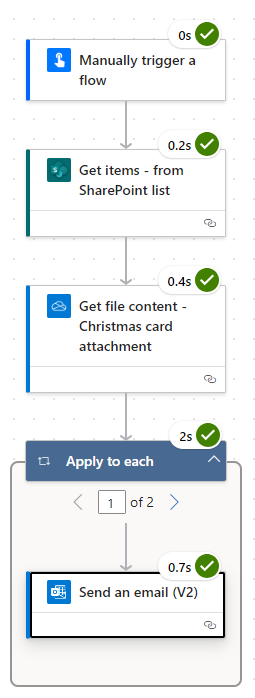
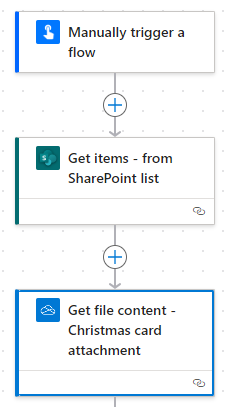
Here's what the final flow will look like when you run it:
The flow is really simple, consisting of a manual trigger and 4 actions.
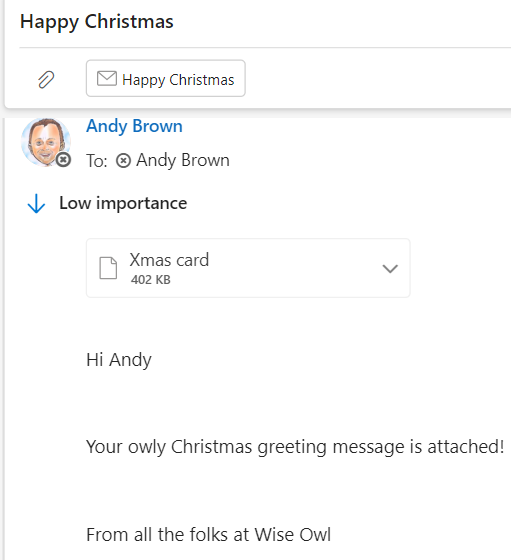
Here's the email that this will send out:
The main part of the message will be the picture shown at the start of this blog, as an attachment.
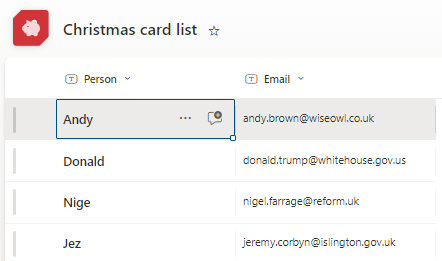
The first thing to do is to create an email list. This could be in Excel online, or (as here) a new SharePoint list:
The new SharePoint list we'll create.
I'm going to use a list containing 2 columns:
The columns give the name of each person and their email address.
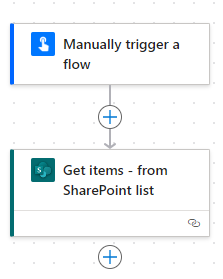
You can now create a flow to bring in the data from this SharePoint list:
We'll manually trigger the flow (you could alternativley schedule it to run at the start of each December), and get the rows from our SharePoint list.
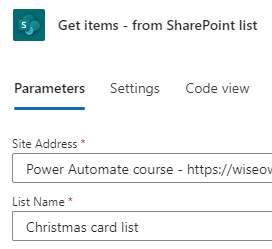
For the Get items action you can just give the SharePoint site address and choose the name of the list:
Configuring the Get items action.
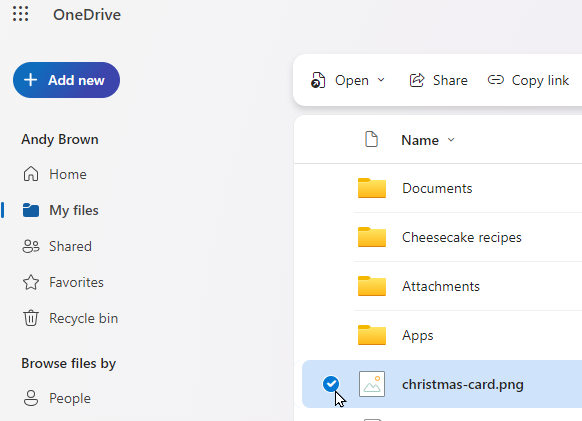
Now upload your Christmas card to OneDrive (or SharePoint) so that you can later add it as an email attachment:
Here we've uploaded a file called christmas-card.png.
Now add an action into your flow to get at this file:
We're getting the file from OneDrive (there's an equivalent action for SharePoint).
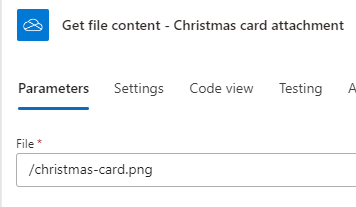
This action will just get the required file from (in our case) the OneDrive root folder:
The image we will attach.
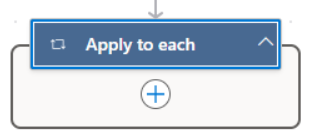
Now add an action to loop over the items returned from our SharePoint Get items action::
Any actions inside this Apply to each container will run once for each SharePoint item (ie for each person).
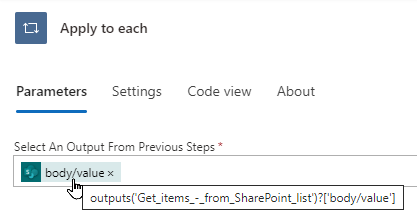
The Apply to each action will get its data from the previous Get items action:
You can choose this dynamic content, which represents the rows returned from the SharePoint list.
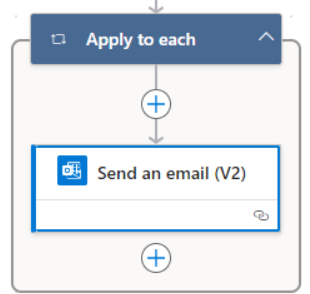
Now add an action within your loop to send an email:
The Send an email action will run once for each SharePoint list item.
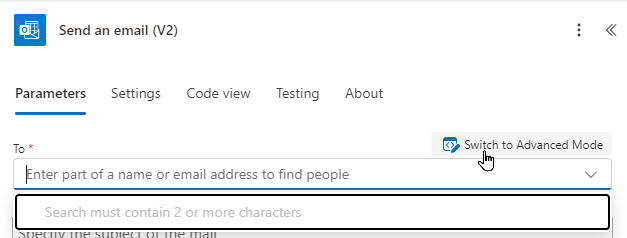
Choose to engage Advanced Mode:
You won't be able to use dynamic content until you switch to advanced mode.
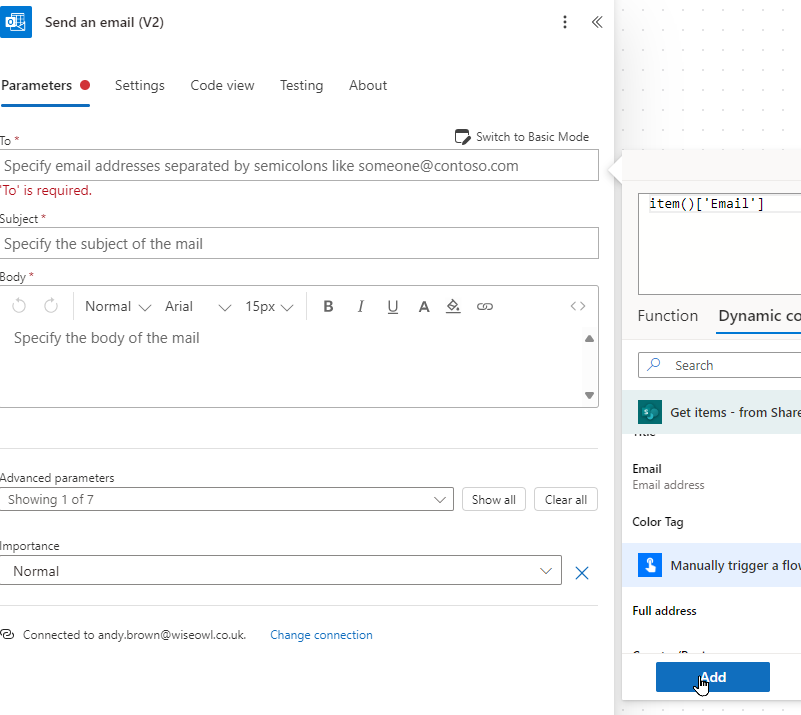
You can then reference the SharePoint list email address:
If you use dynamic content Power Automate will add an extra Apply to each loop, so we've used the item() expression instead to pick up on the Email column from this row.
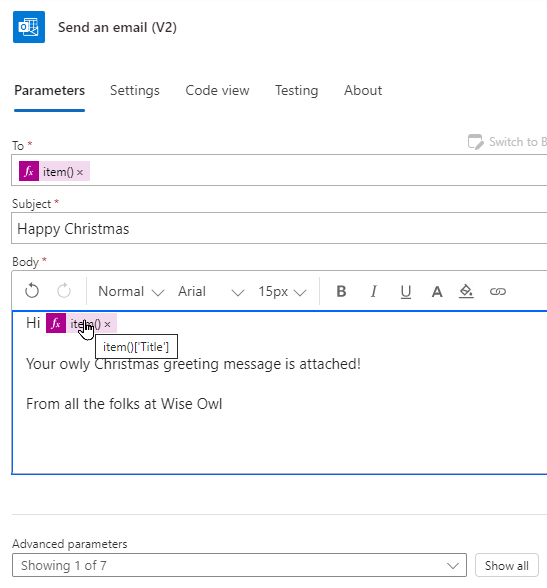
You can now build up the rest of your message:
Notice that even though we renamed the first SharePoint column from Title to Person, you still have to use the original column name for the salutation expression.
Finally you should add your attachment:
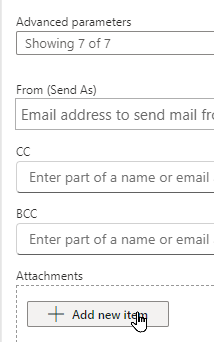
Choose to show all of the extra parameters for sending an email.
Add an attachment:
Click to add your attachment.
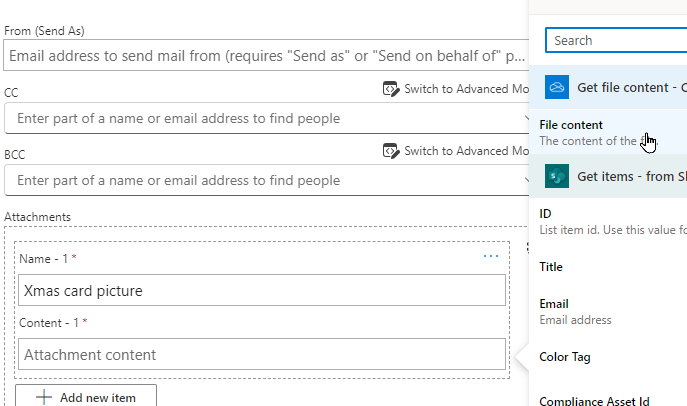
You must give your attachment both a name and content:
Give your attachment a name (here we've called ours Xmas card picture) and choose to use the content of the OneDrive file previously accessed.
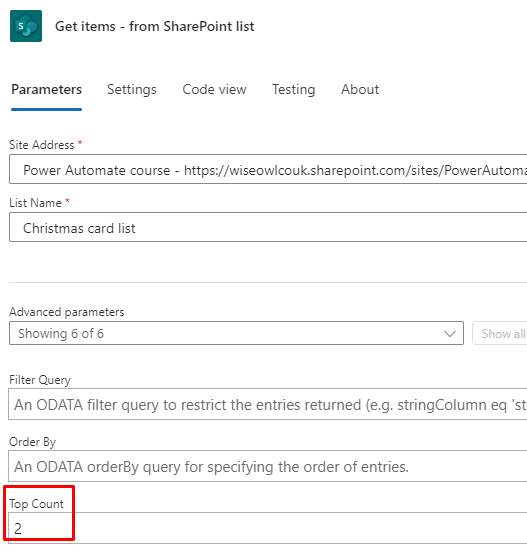
The tricky thing about testing is to ensure you don't send test emails to important clients! One way round this is to set an OData filter limit:
Here we've gone back to the Get items action and set it to get only the first 2 items from the SharePoint list.
You should now be able to safely test your flow!
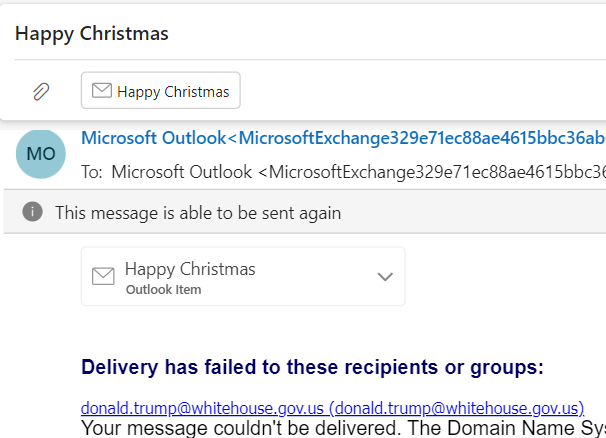
One email was correctly sent, but it turns out Donald is harder to reach than we thought ...
Now it's time to buy presents for your family!
Note that you could alternatively have used the desktop version of Power Automate to do the same thing (this blog shows you how to pull in information relevant to each person from Google when doing this).
Some other pages relevant to the above blog include:
Kingsmoor House
Railway Street
GLOSSOP
SK13 2AA
Landmark Offices
99 Bishopsgate
LONDON
EC2M 3XD
Holiday Inn
25 Aytoun Street
MANCHESTER
M1 3AE
© Wise Owl Business Solutions Ltd 2025. All Rights Reserved.