For a long time I've always shied away from this subject, but it turns out that I shouldn't have: shapes in VBA are surprisingly easy to create and control!
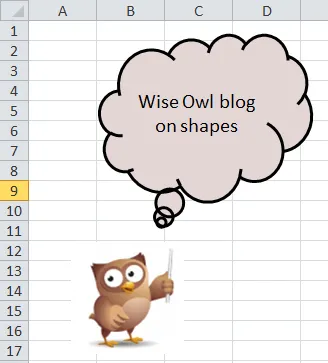
The code to create these two shapes is included later on in this tutorial.
This tutorial goes into the minutiae of how to create autoshapes in VBA. All of the examples are for Excel, but they'll work just as well for PowerPoint VBA or Word VBA.
First, however, a tip to make your shape-life easier (it sounds like something out of a bad science fiction novel ...).
Tip: Use a Worksheet variable
For some reason, VBA doesn't support autocompletion that well when you're working with worksheets. For example, as you type in the following lines of code you won't see any Intellisense to help you:
Worksheets(1).Shapes.AddShape 1, 1, 1, 1, 1
ActiveSheet.Shapes.AddShape 1, 1, 1, 1, 1
Websites will tell you that this is because Excel doesn't know whether you're working with a worksheet or a chart, but I can't see how this can be true for the first line of code above. Whatever ...
By contrast, if you use an object variable to refer to a worksheet life will be MUCH easier:
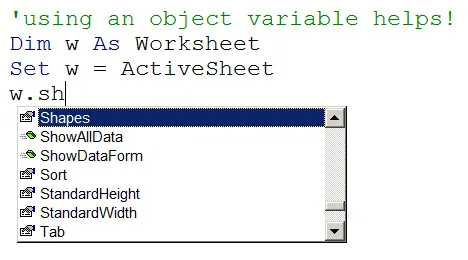
If you use a variable of type Worksheet, VBA knows what you're talking about and can help you.
Looping over shapes
Any worksheet contains a collection of shapes, so often a good place to start is by deleting any shapes that you've already added to a worksheet so that you can start with a blank canvas. The following macro would delete any shapes which have been added to a worksheet:
Sub DeleteShapesOnSheet()
Dim w As Worksheet
Dim s As Shape
Set w = ActiveSheet
For Each s In w.Shapes
s.Delete
Next s
End Sub
The macro works by looking at each of the shapes on the worksheet in turn, applying the Delete method to remove it.
Adding new shapes
The easiest way to add a shape in VBA is to apply the AddShape method to the existing collection of shapes:

Some of the arguments to the AddShape method (the full list is shown below).
The full list of arguments that you need to specify when adding a shape like this are as follows:
No. | Argument | Type | Notes |
|---|
1 | Type | Integer or enumeration | The shape that you're adding (see below for more on this). |
2 | Left | Single | The position of the shape from the left edge of the worksheet. |
3 | Top | Single | The position of the shape from the top edge of the worksheet. |
4 | Width | Single | The width of the shape. |
5 | Height | Single | The height of the shape. |
All units are in points, which is the typical unit for font size. When you read a book or magazine article, the font size is probably between 10 and 14 points high.
You can add a shape either by specifying its enumeration or by using the integer equivalent. So both of these commands will add the same rectangle:
Dim w As Worksheet
Set w = ActiveSheet
w.Shapes.AddShape msoShapeRectangle, 10, 10, 30, 20
w.Shapes.AddShape 1, 50, 10, 30, 20
Here are the shapes added by this code:
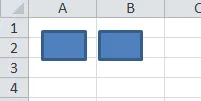
The only difference is that one shape is added 10 points in from the left-hand side, and one is added 50 points in from the left.
Whether you choose to specify the shape type by its number or by its enumeration is up to you!
Listing out the types of shapes
A list of the first 137 autoshape types is shown below (for versions of Excel up to 2003, that's all that there is available):
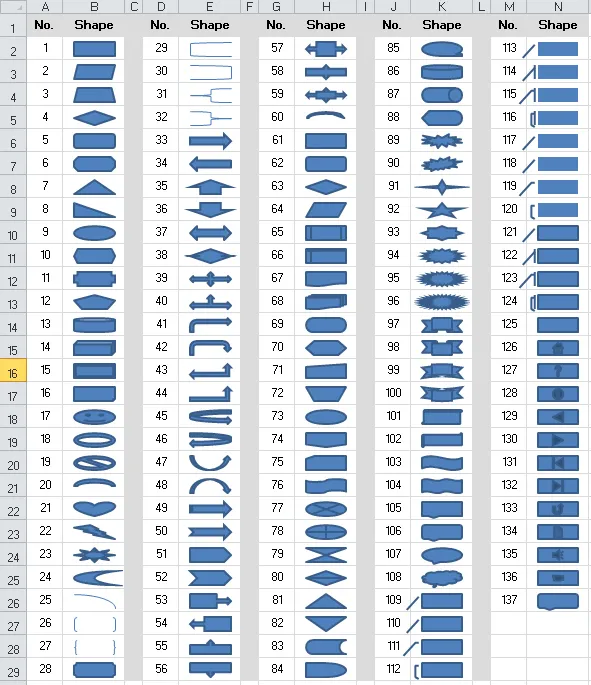
The main autoshapes in VBA!
Generating the list of shapes
It's neither particularly well-written or well-commented, but for the sake of completion (and in case anyone finds it useful for reference), here's the code I wrote to generate the above list:
Sub ListShapes()
Dim ws As Worksheet
Dim s As Shape
Dim c As Range
Dim l As Single
Dim t As Single
Dim w As Single
Dim h As Single
Set ws = ActiveSheet
For Each s In ws.Shapes
s.Delete
Next s
Cells.Clear
Dim col As Integer
Dim topcell As Range
For col = 1 To 5
Set topcell = Cells(1, 3 * col - 2)
topcell.Value = "No."
topcell.Offset(0, 1).Value = "Shape"
topcell.EntireColumn.ColumnWidth = 5
topcell.Offset(0, 1).ColumnWidth = 9
topcell.Offset(0, 2).ColumnWidth = 2
Next col
With Range("A1:N1")
.Font.Bold = True
.HorizontalAlignment = xlCenter
.VerticalAlignment = xlCenter
.Interior.Color = RGB(220, 220, 220)
End With
Dim rowNumber As Integer
Dim colNumber As Integer
Dim shapeNumber As Integer
colNumber = 1
rowNumber = 1
For shapeNumber = 1 To 137
rowNumber = rowNumber + 1
If rowNumber > 29 Then
rowNumber = 2
colNumber = colNumber + 3
End If
Set c = Cells(rowNumber, colNumber)
c.Value = shapeNumber
l = c.Offset(0, 1).Left + 10
t = c.Offset(0, 1).Top + 5
w = 35
h = 12
Set s = ws.Shapes.AddShape(shapeNumber, l, t, w, h)
c.HorizontalAlignment = xlCenter
c.VerticalAlignment = xlCenter
c.RowHeight = 20
If colNumber < 13 Then
c.Offset(0, 2).Interior.Color = RGB(220, 220, 220)
End If
Next shapeNumber
MsgBox "Done!"
End Sub
Adding a shape without getting a reference to it
Once you've added a shape, you'll want to be able to refer to it in the future - and you'll also need to know how to position it exactly where you want on the screen. Consider the following block of code, which adds a square to the current worksheet:
Sub AddSquare()
Dim ws As Worksheet
Set ws = ActiveSheet
ws.Shapes.AddShape 1, 50, 50, 100, 100
End Sub
The problem with this method is that there's no easy way to refer to the shape after adding it. If it's the only shape added to date, this would work:
However, referring to a shape by its index number within the collection of shapes clearly isn't a reliable method.
Adding a shape while at the same time getting a reference to it
A much better way to add a shape is by setting an object variable to refer to it immediately after adding it:
Sub AddSquare()
Dim ws As Worksheet
Dim sq As Shape
Set ws = ActiveSheet
Set sq = ws.Shapes.AddShape(1, 50, 50, 100, 100)
sq.Name = "WOL_0001"
End Sub
Note that (as always in VBA) if you're capturing a reference to something, you need to include brackets round the argument list. The advantage of the above approach is that you can now refer to the shape that's been added either by the object variable used:
Or by its name:
ws.Shapes("WOL_0001").Left = 300
Shape names are a bit strange in VBA, and are not necessarily unique. Rather than trying to understand the rules, the simplest thing is to generate and assign unique names yourself for shapes that you've created programmatically.
Positioning shapes relative to cells
You've already seen that when you position a shape you do it relative to the top left corner of a worksheet. However, it's easy enough to change this to position a shape relative to a cell:
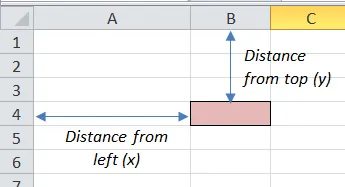
To position a shape in the shaded cell, we just need to know the two distances shown.
For example, supposing that we want to add a shape within the cell like this:
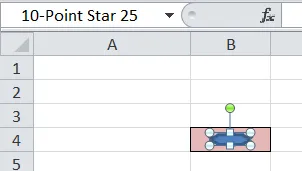
The shape is half the width of the cell, and half its height.
Here's some sample code to do this:
Sub AddShapeToCell()
Dim c As Range
Dim ws As Worksheet
Set ws = ActiveSheet
Set c = Range("B4")
ws.Shapes.AddShape Type:=msoShape10pointStar, _
Left:=c.Left + (c.Width / 4), _
Top:=c.Top + (c.Height / 4), _
Width:=c.Width / 2, _
Height:=c.Height / 2
End Sub
This code will position the shape relative to the top left corner of the cell, rather than of the worksheet.
One thing to watch is that the units for column widths/row heights aren't the same as for shapes!
Formatting Shapes
Now that we know how to refer to our shapes (and how to position them where we want on screen), it's time to make them look pretty!
Formatting shapes is easy provided that you understand that there are two main properties that you can play about with:
Property | What it allows you to change |
|---|
Fill | The background colour or pattern for a shape |
Line | The border line for a shape |
One other oddity: it's the ForeColor of a shape's fill that you'll usually want to change:
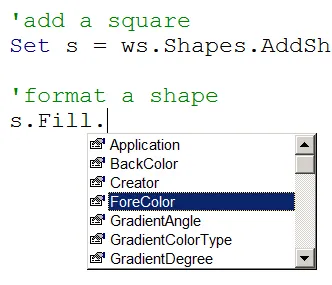
It's the foreground colour of a shape's fill pattern that'll usually be of most interest.
Here's some code to create a pretty circle, for example:
Set s = ws.Shapes.AddShape(9, 10, 10, 50, 50)
With s.Fill
.ForeColor.RGB = RGB(255, 240, 255)
.Transparency = 0.2
End With
This would create a circle which is 20% transparent and has a different background colour:
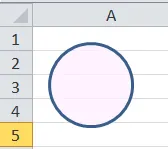
The circle created by the above code.
You could extend the macro above to change the border colour and style of the shape:
With s.Line
.ForeColor.RGB = RGB(100, 0, 100)
.DashStyle = msoLineDashDot
.Weight = 5
End With
The circle is now beginning to look a bit silly:
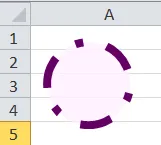
Perhaps our choices weren't so good after all ...
To do detailed formatting of shapes, a good way forward is to record a macro and then play about with the code generated.
Adding text to shapes
Any shape added has a TextFrame property, which gives you access to the text within it. This in turn has a collection of Characters!
CalloutBalloon.TextFrame.Characters.Text = "Wise Owl blog on shapes"
CalloutBalloon.TextFrame.Characters.Font.Color = 1
CalloutBalloon.TextFrame.Characters.Font.Size = 14
CalloutBalloon.TextFrame.HorizontalAlignment = xlHAlignCenter
CalloutBalloon.TextFrame.VerticalAlignment = xlVAlignCenter
Thus the code above sets the text in the relevant shape called CalloutBalloon, then changes its font and alignment. You can format only part of the text in a shape, as this example shows:
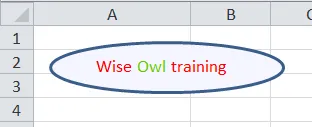
Here we've forwarded only the characters from 6 to 9.
Here's some code to achieve the above:
Sub AddShapeToCell()
Dim s As Shape
Dim ws As Worksheet
Set ws = ActiveSheet
Set s = ws.Shapes.AddShape(9, 10, 10, 140, 30)
s.Fill.ForeColor.RGB = RGB(245, 245, 255)
s.TextFrame.Characters.Text = "Wise Owl training"
s.TextFrame.Characters.Font.ColorIndex = 3
With s.TextFrame.Characters(6, 3)
.Font.Color = RGB(100, 200, 0)
End With
End Sub
This changes the colour of the 3 characters from position 6 onwards.
Note that this is one of those occasions when (to keep you on your toes) VBA numbers things in a collection from 1, not 0.
A complete example - creating our Wise Owl call-out
Here's the example from the beginning of this tutorial:
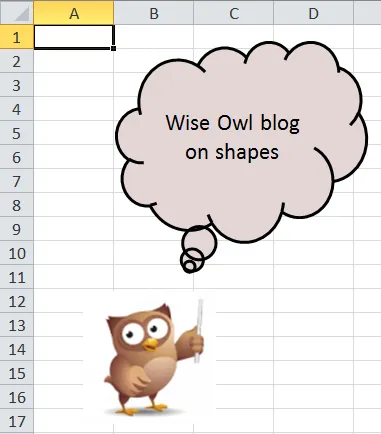
As promised, below is the code to create these two shapes!
The code to produce it could be as follows:
Dim w As Worksheet
Sub DeleteShapesOnSheet()
Dim w As Worksheet
Dim s As Shape
Set w = ActiveSheet
For Each s In w.Shapes
s.Delete
Next s
End Sub
Sub CreateWiseOwlBalloon()
Dim CalloutBalloon As Shape
Dim Logo As Shape
Set w = ActiveSheet
DeleteShapesOnSheet
Set CalloutBalloon = w.Shapes.AddShape(108, 50, 10, 150, 120)
CalloutBalloon.Fill.ForeColor.RGB = RGB(227, 214, 213)
CalloutBalloon.Line.ForeColor.RGB = RGB(0, 0, 0)
CalloutBalloon.TextFrame.Characters.Text = "Wise Owl blog on shapes"
CalloutBalloon.TextFrame.Characters.Font.Color = 1
CalloutBalloon.TextFrame.Characters.Font.Size = 14
CalloutBalloon.TextFrame.HorizontalAlignment = xlHAlignCenter
CalloutBalloon.TextFrame.VerticalAlignment = xlVAlignCenter
Set Logo = w.Shapes.AddShape(1, 30, 160, 80, 80)
Logo.Fill.UserPicture "C:\ajb files\wise-owl-logo.jpg"
Logo.Line.Visible = msoFalse
End Sub
Running the CreateWiseOwlBalloon routine should create the two shapes shown (although you'll need to substitute your own picture file path to get it to work).
Lines and Connectors
Time now to look at some specialist shapes: lines and connectors.
This tutorial doesn't claim to be exhaustive - there are a LOT of things you can do with shapes:
Just some of the things you could experiment with!
Adding lines
To add a line, specify its start and end point (logical, really):

The arguments when adding a line.
For example, suppose that you wanted to add this red line:
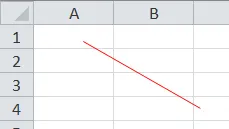
This line starts at (30,10) and ends at (100,50).
Here's the code to add the line above:
Sub AddRedLine()
Dim ws As Worksheet
Dim s As Shape
Set ws = ActiveSheet
Set s = ws.Shapes.AddLine(30, 10, 100, 50)
s.Line.ForeColor.RGB = RGB(255, 0, 0)
End Sub
Types of connector
When adding connectors, it helps to know that there are 3 types:
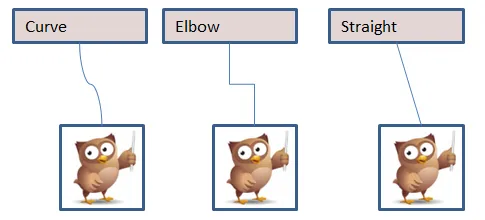
As you move each owl around, the connector will stay ... connected to it!
Adding a connector
To add a connector:
Add a connector shape, as you would do a line.
Tell it which shape to begin at.
Tell it which shape to end at.
Finally, reroute the connections (this basically makes sure that the connector is where it should be on screen, given the current position of the two shapes it's linking together).
To draw the connector on the left above (the curved one), first create the two shapes (the textbox and the owl logo):
Sub CreateShapes()
Dim rect As Shape
Dim Logo As Shape
Dim conn As Shape
Set w = ActiveSheet
Set rect = w.Shapes.AddShape(1, 10, 10, 80, 20)
rect.TextFrame.Characters.Text = "Curve"
rect.Fill.ForeColor.RGB = RGB(227, 214, 213)
rect.TextFrame.Characters.Font.ColorIndex = 1
Set Logo = w.Shapes.AddShape(1, 30, 80, 50, 50)
Logo.Fill.UserPicture "C:\ajb files\wise-owl-logo.jpg"
You'll need to use a different picture, of course, if you want to reproduce this. Next, add the connector:
Set conn = w.Shapes.AddConnector(msoConnectorCurve, 1, 1, 1, 1)
Note that it's not worth thinking about its position or size, as when you reroute it VBA will redraw it. Now say what the connector is connecting!
conn.ConnectorFormat.BeginConnect rect, 1
conn.ConnectorFormat.EndConnect Logo, 1
The second argument above specifies whether you're connecting the top, left, right or bottom of the given shape, but it doesn't seem to make much difference what value you use.
Finally, you should update the position of the connector:
conn.RerouteConnections
End Sub
The cool thing now is that as you drag either shape around the connector will follow it!
There are two main ways to work with a number of shapes at the same time: by using the ShapeRange object, or by looping over a collection of shapes.
Most Microsoft examples use the first method (the ShapeRange object); I find the second much easier to work with, however. Examples of both are shown below.
Using the ShapeRange object
You can use an object of type ShapeRange to get access to a set of shapes, allowing you to set properties and apply methods to a set of shapes simultaneously. Here's an example of its use:
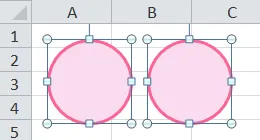
We want to colour these circles pink, and give them a red border.
One way to do this is to draw the shapes, then select them:
Sub AddCircles()
Dim ws As Worksheet
Dim c1 As Shape
Dim c2 As Shape
Set ws = ActiveSheet
Set c1 = ws.Shapes.AddShape(msoShapeOval, 10, 10, 50, 50)
Set c2 = ws.Shapes.AddShape(msoShapeOval, 70, 10, 50, 50)
ws.Shapes.SelectAll
Now that the shapes are selected, we can apply the ShapeRange method to the current selection to return a set of shapes (I did warn you that I preferred the other method!):
Dim sr As ShapeRange
Set sr = Selection.ShapeRange
sr.Fill.ForeColor.RGB = RGB(250, 220, 240)
sr.Line.ForeColor.RGB = RGB(250, 100, 150)
End Sub
You can abbreviate this as follows:
ws.Shapes.SelectAll
Selection.ShapeRange.Fill.ForeColor.RGB = RGB(250, 220, 240)
Selection.ShapeRange.Line.ForeColor.RGB = RGB(250, 100, 150)
The problem with this approach is that it doesn't allow for autocompletion:

Commands beginning with Selection don't support Intellisense.
Because of the above limitation, it's easier to create an intermediate ShapeRange variable and use this to refer to a set of shapes.
Looping over a collection of shapes
It's just so much easier (I humbly submit) to loop over all of the shapes, colouring each in turn:
Sub AddCircles()
Dim ws As Worksheet
Dim c1 As Shape
Dim c2 As Shape
Dim s As Shape
Set ws = ActiveSheet
Set c1 = ws.Shapes.AddShape(msoShapeOval, 10, 10, 50, 50)
Set c2 = ws.Shapes.AddShape(msoShapeOval, 70, 10, 50, 50)
For Each s In ws.Shapes
s.Fill.ForeColor.RGB = RGB(250, 220, 240)
s.Line.ForeColor.RGB = RGB(250, 100, 150)
Next s
End Sub
I accept that the above code probably runs more slowly, but you would have to have a serious number of shapes on a worksheet for this to matter!
Checking the type of shapes
One useful thing to be able to do is to check what type each shape is as you loop over it. You can do this by testing a shape's Type, and then more specifically its AutoShapeType:
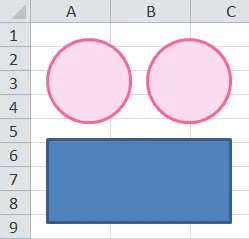
We'll write code to colour the ovals, but not the rectangle.
Here's some code to achieve the above:
Sub FormatOnlyCircles()
Dim ws As Worksheet
Dim c1 As Shape
Dim c2 As Shape
Dim r1 As Shape
Dim s As Shape
Set ws = ActiveSheet
Set c1 = ws.Shapes.AddShape(msoShapeOval, 10, 10, 50, 50)
Set c2 = ws.Shapes.AddShape(msoShapeOval, 70, 10, 50, 50)
Set r1 = ws.Shapes.AddShape(msoShapeRectangle, 10, 70, 110, 50)
For Each s In ws.Shapes
If s.Type = msoAutoShape Then
If s.AutoShapeType = msoShapeOval Then
s.Fill.ForeColor.RGB = RGB(250, 220, 240)
s.Line.ForeColor.RGB = RGB(250, 100, 150)
End If
End If
Next s
End Sub
Although this tutorial has concerned itself almost exclusively with autoshapes, there are lots of other shapes that you can add!
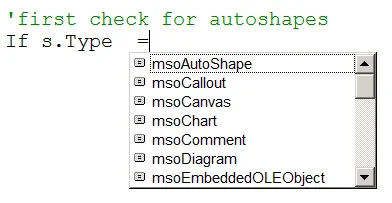
Just some of the other shape types that you can add to a workbook!
Having spent all of this time looking at how to create shapes, let's now take a quick look at how to assign macros to them.
Perhaps the most remarkable thing that you can do with shapes is get them to run macros:
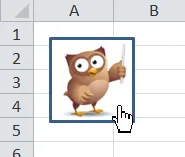
We'll arrange it so that when you click on the shape, you'll see a message box appear!
Here's the message that clicking on the owl will show:
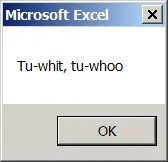
The message our macro will show.
To make this work you need to create a macro first, then assign it to a shape.
Creating the macro
Here's a modest macro which displays the hoot message on screen (and reads it out for good measure, although it sounds a bit strange!):
Sub Hoot()
MsgBox "Tu-whit, tu-whoo"
Application.Speech.Speak "Tu-whit, tu-whoo"
End Sub
The macro you create must be contained in the same workbook as the shape.
Assigning a macro to a shape
To do this, set the shape's OnAction property:
Sub CreateShapes()
Dim Logo As Shape
Set w = ActiveSheet
Set Logo = w.Shapes.AddShape(1, 10, 10, 50, 50)
Logo.Fill.UserPicture "C:\ajb files\wise-owl-logo.jpg"
Logo.OnAction = "Hoot"
End Sub
That's all that you need to do! Clicking on the shape will now run the Hoot macro.


