Using the Import Wizard in SQL Server
Once you have opened the import wizard there are several steps to follow in order to create an SSIS package. This part of the series explains what you need to do.
Before we get started, if you've opened the wizard and you see a welcome message, just click Next to get to the useful part!
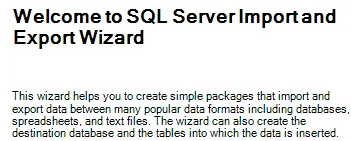
If you see this message, just click Next.
Step 1 - Choosing a Data Source
The first real step of the wizard asks you where your data comes from.
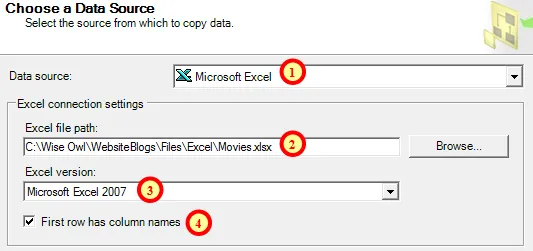
Tell the wizard where your data is stored. The numbered steps are explained below.
Choose the type of file that contains your data. Here we've chosen Microsoft Excel. The option you select here affects the subsequent options on this page of the wizard.
For an Excel spreadsheet you must say where the file is saved.
Different versions of Excel store their data in different ways so it's important to say which version your file is saved as. All Excel file types are grouped together as Microsoft Excel 2007.
Specify whether the first row of your data contains the column headings.
Click Next at the bottom of the dialog box.
Step 2 - Choosing a Destination Database
The next step is to tell the wizard which database you want the data to be imported to.
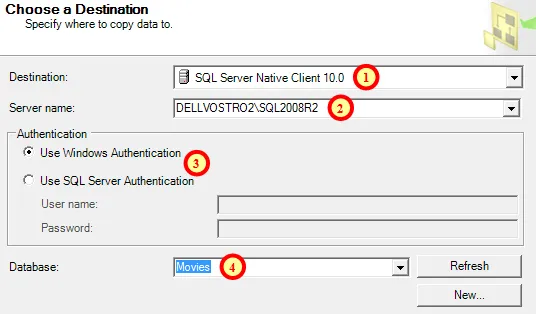
Specify where the data should go when it is imported. The numbered steps are explained below.
Choose the type of destination source for your data. The option you select here affects the other options on this page of the wizard.
As we selected a SQL Server destination for part 1, we need to say which SQL Server we want to use here.
This option specifies the authentication to be used to connect to the server you've chosen.
Choose the database you want to send the data to, or click New... to create a new database.
Click the Next button at the bottom of the wizard.
Step 3 - Choose which Data to Import
In this step you can specify exactly which data you want to import from the data source you selected in step 1.
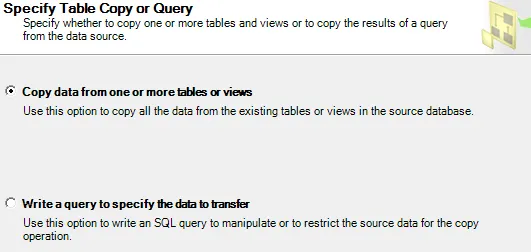
Here we're going to select all of the data from the Excel spreadsheet, rather than write a separate query to get the data. Click Next to move on to the next step.
Step 4 - Configure the Tables to which the Data will be Imported
This step lets you choose which tables the data you are importing will end up in, and also what should happen to the existing data in those tables.
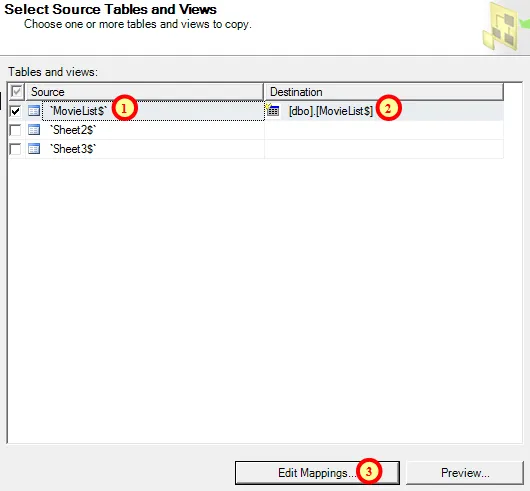
Choose what will be imported and where it will be imported to. The numbered steps are described below.
Choose the tables, or in this case worksheets, you want to import the data from.
Choose which table the selected worksheet will be imported to.
Click Edit Mappings... for more options, as described below.
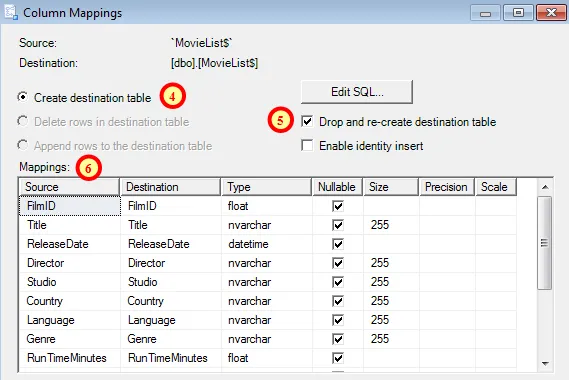
Use this dialog box to customise the individual fields in the imported data.
Choose what to do with data that is already in the table you are importing into. Here we're creating the destination table each time.
We've also chosen to drop and re-create the destination table each time we run the import.
Use the Mappings table to control the names and data types of the imported fields.
Click OK and then Next.
Step 5 - Choose When to Run the Import Steps
In this step you can choose whether to run the import immediately or to save the import steps for use later on.
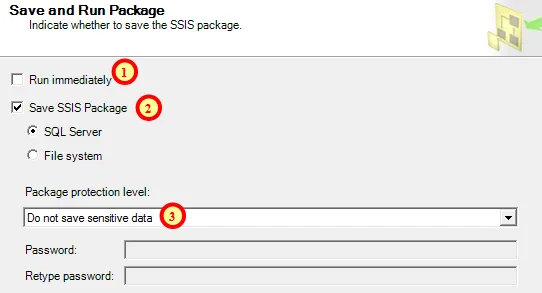
Choose when you want the import to happen.
We've chosen to not run our import when the wizard ends.
We've also chosen to save an SSIS Package that contains all of the information required to run the import at a later time. We've selected to save the package onto the SQL Server, rather than as a separate file on our computer.
Choose the level of protection for the package. Here we've chosen not to save sensitive data in the package, meaning that if other people attempt to use this package they will be prompted to fill in the missing information.
Click Next at the bottom of the dialog box.
Users of SQL Server Express Edition should be aware that they won't be provided with the option to save the import steps as an SSIS package and so can only choose to execute the import steps immediately.
Step 6 - Saving the SSIS Package
If you chose to save the package in the previous step you can specify the name and location here.
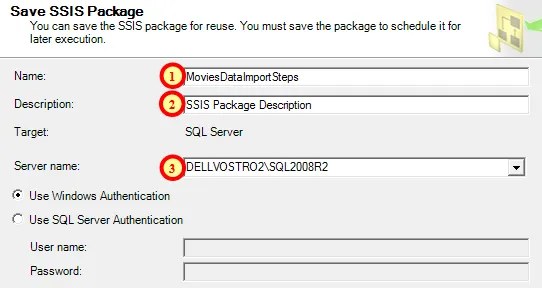
Save the SSIS package according to the options you select here.
Type in a recognisable name for the package - we'll need this later on when we choose to schedule the import steps.
You can optionally type in a description here.
Choose the server or filename to save the package depending on the option you selected in the previous step of the wizard.
Click Next at the bottom of the dialog box.
Step 7 - Completing the Wizard
The final step summarises the choices you have made and simply asks to you to confirm everything you have done by clicking Finish at the bottom of the dialog box.
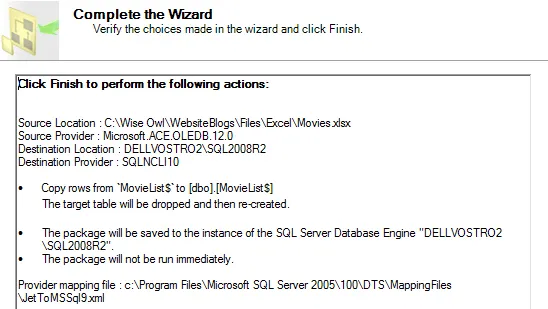
Simply click Finish to confirm the settings you have applied.
If everything works properly you should see a list of tasks being performed in a separate dialog box.
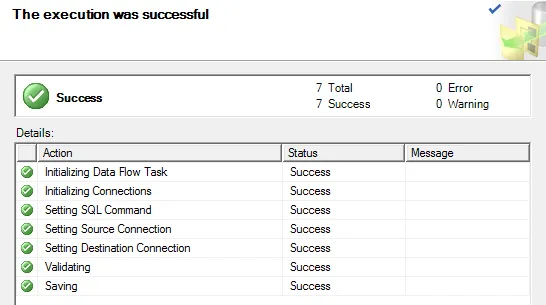
Success! Now all you need to do is click Close.
Viewing an SSIS Package Saved as a File
You can view your SSIS package in one of two different ways, depending on whether you saved it as part of your computer's file system or on the SQL Server.
If the package is saved as a file on your computer you can simply browse for it in a Windows Explorer window.
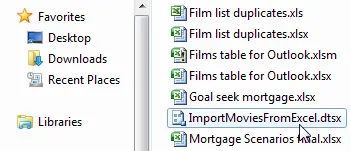
The file will have a dtsx extension.
Viewing an SSIS Package Saved in SQL Server
In order to view a package saved in SQL Server you must first connect to an SSIS server:
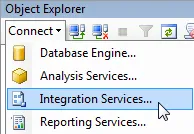
Click Connect at the top of the Object Explorer window and choose Integration Services...
You will be able to see your SSIS package by expanding the sequence of folders shown below:
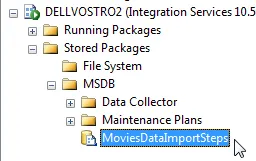
The SSIS package that we created earlier is shown here.
You can even run the package by right-clicking on it and choosing Run Package.
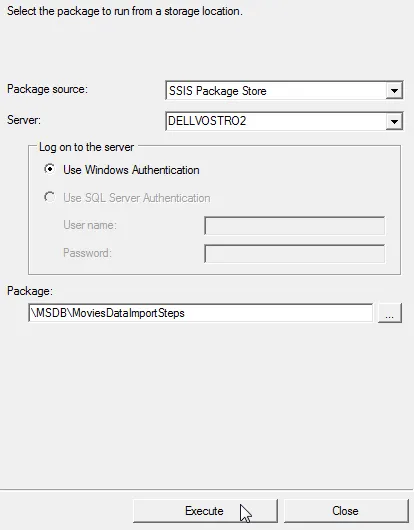
Simply click Execute to run the import steps you saved earlier.
What's Next?
Although we can run the SSIS package by right-clicking on it, it's much more useful to set up a schedule on which to to execute it. Read the next part of this series to find out how to do this, or have a look at some of the other training we offer in SQL.


