Read our blogs, tips and tutorials
Try our exercises or test your skills
Watch our tutorial videos or shorts
Take a self-paced course
Read our recent newsletters
License our courseware
Book expert consultancy
Buy our publications
Get help in using our site
546 attributed reviews in the last 3 years
Refreshingly small course sizes
Outstandingly good courseware
Whizzy online classrooms
Wise Owl trainers only (no freelancers)
Almost no cancellations
We have genuine integrity
We invoice after training
Review 30+ years of Wise Owl
View our top 100 clients
Search our website
We also send out useful tips in a monthly email newsletter ...
What Power BI report server is, and how to create reports through it Part two of a five-part series of blogs |
---|
Puzzled as to why there are two near-identical versions of Power BI Desktop? Wondering if web portal is anything like Power BI report server? Confused as to what a paginated report is? This blog answers all these questions, and more!
|
In this blog
You can install and configure Power BI Report Server by following the instructions below!
First download it from this Microsoft site:
Click on the obvious button!
To run Power BI Report Server at the time of writing you'll need Windows 10, SQL Server 2012 or later and the .NET framework 4.7 or later (although you don't need to worry too much about this last one, as it will be updated as part of the installation process).
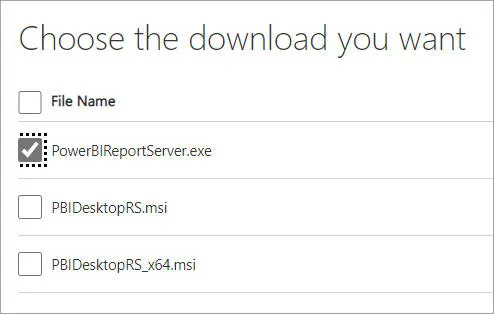
Choose which file you want to download:
Choose to install Power BI Report Server (see later in this blog series for what the other two files do).
When the download has finished, run it:
This is what the download looks like in Edge, for example.
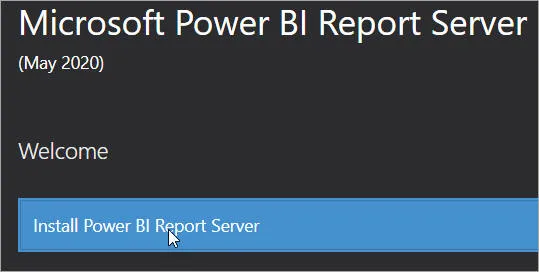
Choose to install it:
Click on the button!
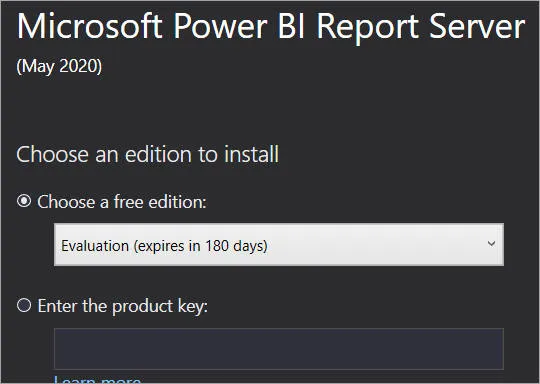
I'm guessing that you'll want to evaluate the software first, like me:
Choose this option, then click on Next.
However, you can choose a free developer edition instead:
The two editions are identical. You can not use the Developer edition of Power BI Report Server in a "production environment" (so you can use it for developing software, but not for use thereafter within your company). You can see the full list of differences here.
Confirm your acceptance of the terms and conditions on the next page, then choose what you want to install:
I've got various instances of SQL Server on my laptop, so I just need the report server.
Choose a location, then click on Install:
I'm putting the software in the default location.
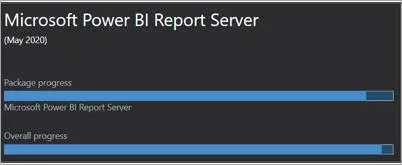
It took under a minute on my laptop:
You can see how the installation is going.
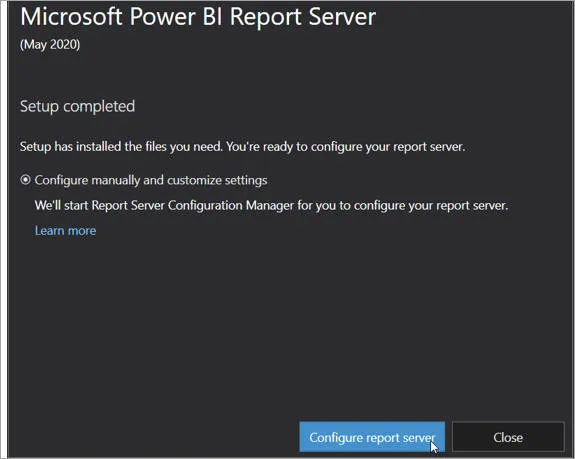
You can now choose to configure Power BI Report Server:
Choose to configure Report Server.
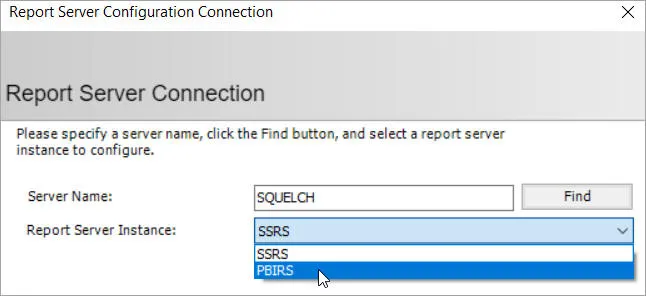
If you've also got SSRS web portal installed on your computer (as I have), be careful to choose the right version of Report Server:
It's the Power BI version of Report Server I want to configure, so I need to change the default choice.
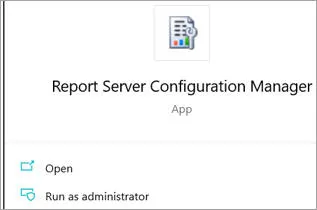
Note that if you get anything wrong, you can can always run this program from your desktop:
The installation process just takes you into a standalone application called Reporting Services Configuration Manager.
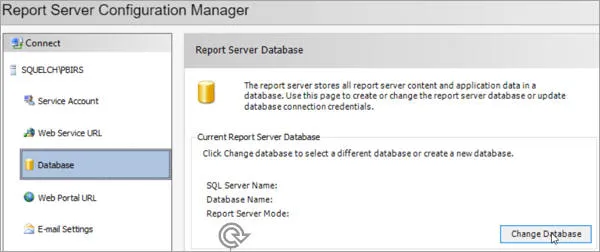
If you haven't already got SQL Server on your computer, I would guess that you'll now be asked to install it. Otherwise, you'll just need to set up a database to hold your reports:
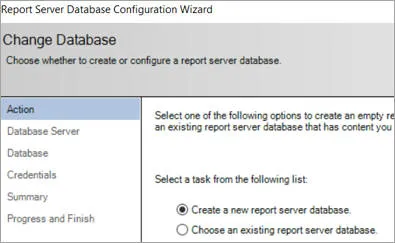
Choose to change (in this case, to set up) a database.
I don't have a database set up (and neither will you), so choose to create one:
Choose to create a new report server database.
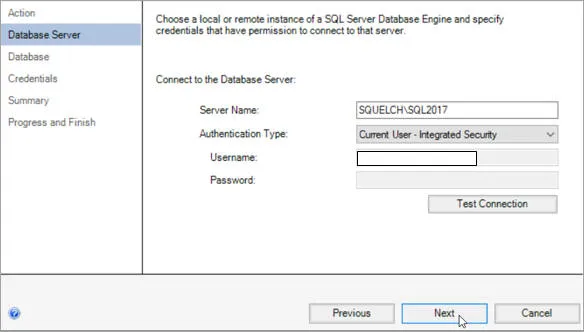
Log on to an instance of SQL Server:
Log on to an instance of SQL Server running on your computer (don't forget to check that the SQL Server service is running).
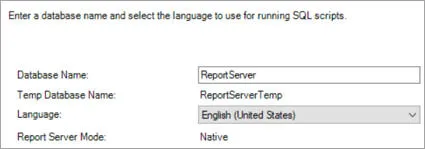
Choose a name for your new report server database:
I've gone for the default name.
Choose your security credentials:
I've gone for the default option (I don't claim to be a security expert!).
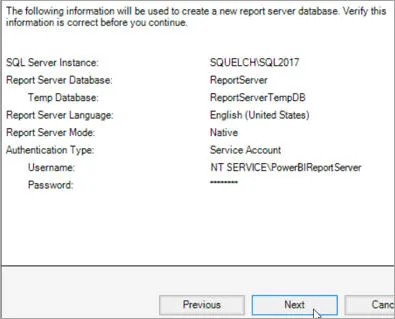
Confirm you're happy with your details:
Check you're happy, then click on Next.
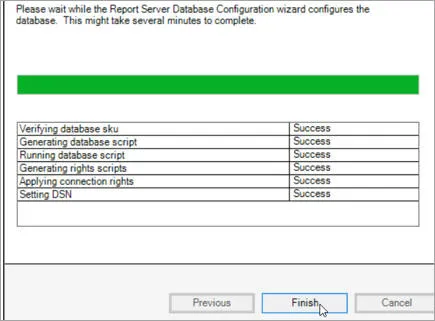
With a bit of luck, you'll soon see this:
Success!
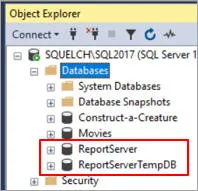
If you like, you can now go into SQL Server Management Studio to see your new databases:
Alongside a couple of training databases, I've got my two new report server databases in Management Studio.
It's now time to set up the web portal for report server:
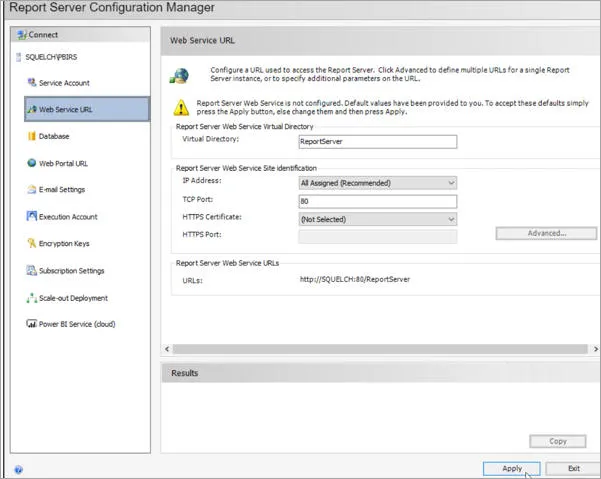
Click on the Web Service URL tab as shown, check your settings (I've used the defaults again) and click on the Apply button.
The configuration manager creates a URL for you, although for now you won't see much at it:
The report server URL generated in my case.
Note that you can substitute localhost for the name of your computer (in my case, for historic reasons this is SQUELCH!).
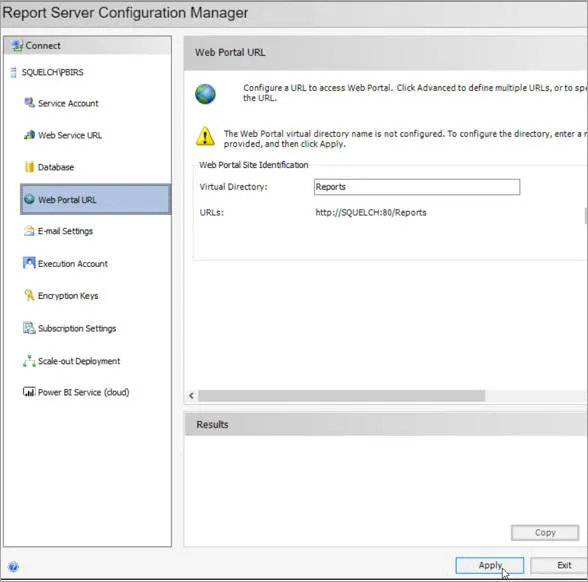
Finally, you need to set up the directory at your report server website:
Click on the Web Portal URL tab as shown, then click on Apply.
You should now be able to exit out of your configuration settings, and try out your web portal:
If you've chosen the same default options as me, you'll be able to type in this URL into your browser.
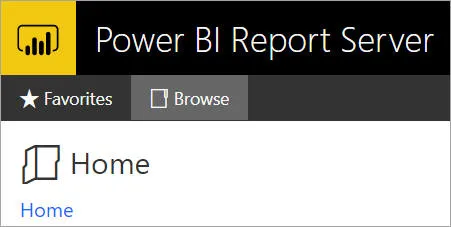
You should now see this:
It's all been worth it!
This blog doesn't attempt to be a report server tutorial, but it's fairly easy to learn how to do anything in Power BI report server (from viewing reports through to creating subscriptions).
Parts of this blog |
---|
|
Some other pages relevant to the above blogs include:
Kingsmoor House
Railway Street
GLOSSOP
SK13 2AA
Landmark Offices
99 Bishopsgate
LONDON
EC2M 3XD
Holiday Inn
25 Aytoun Street
MANCHESTER
M1 3AE
© Wise Owl Business Solutions Ltd 2024. All Rights Reserved.