Read our blogs, tips and tutorials
Try our exercises or test your skills
Watch our tutorial videos or shorts
Take a self-paced course
Read our recent newsletters
License our courseware
Book expert consultancy
Buy our publications
Get help in using our site
546 attributed reviews in the last 3 years
Refreshingly small course sizes
Outstandingly good courseware
Whizzy online classrooms
Wise Owl trainers only (no freelancers)
Almost no cancellations
We have genuine integrity
We invoice after training
Review 30+ years of Wise Owl
View our top 100 clients
Search our website
We also send out useful tips in a monthly email newsletter ...
Calling the OpenAI API to create Dall-E images from C# |
---|
For our newsletter competition this month everyone gets one shot only at creating a perfect image in Dall-E. This blog takes a behind-the-scenes look to explain the nuts and bolts of how we used the OpenAI API to get this to work. |
In this blog
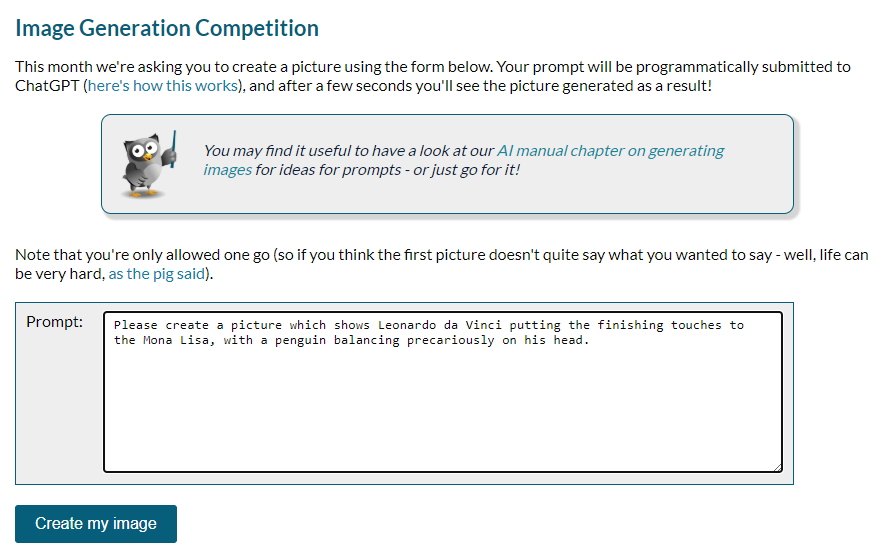
For our December 2024 newsletter competition we invited people to create a picture using ChatGPT:
I'm writing this blog in real time, so don't yet know what this picture will look like! I'm not optimistic though ...
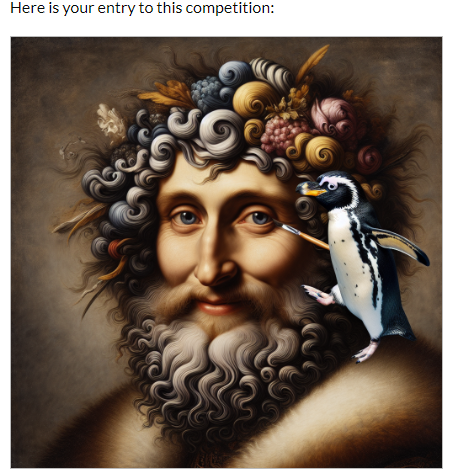
When someone clicks on the button to create an image, a call goes out to the OpenAI API. This then sends back the image:
I was right to be pessimistic.
The question is: how did this work?
This doesn't claim to be a tutorial, but instead gives you the steps that you need to follow in outline. It will be especially useful for anyone who is trying to call the OpenAI API from C#.
To be able to interact with ChatGPT programmatically you'll need to use the OpenAI API (Application Programming Interface) - and for that you'll need an API key. You can get this by signing up here:
Once you've signed up you can click on this link to see information to do with your account.
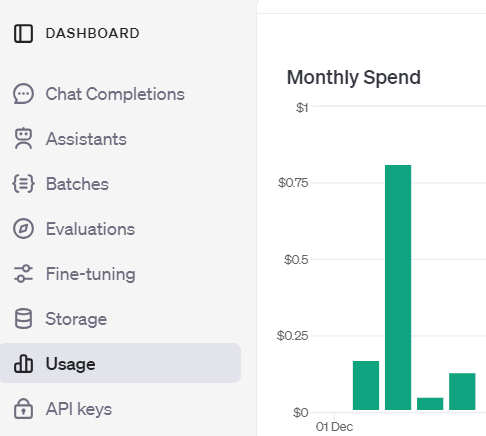
You can use the dashboard (among other things) to see how much your account is costing you:
Our experience so far is that generating an image costs a matter of cents.
If you want to be able to use C# to call the OpenAI API you shouuld add the OpenAI package using Nuget:
Add this package using the NuGet package manager in Visual Studio. Notice that it's still officially in beta.
When someone requests a picture you should initiate a new API request (obviously the API key will be the one given when you first created your API account):
// authenticate yourself
var openAiApiKey = "sk-proj-long-sequence-of-meaningless-characters";
// would be better to use an environment variable
// Environment.GetEnvironmentVariable("OPENAI_API_KEY");
// say which model you are interacting with
OpenAI.Images.ImageClient imageClient = new OpenAI.Images.ImageClient(
model: "dall-e-3",
apiKey: openAiApiKey
);
When creating a new image you can choose which model to use - here we're using version 3 of Dall-E (the latest one).
Having started an API request like this, you can now give some more details on the image you want to create and then request it:
// the image generation options
var igo = new ImageGenerationOptions();
igo.Size = new OpenAI.Images.GeneratedImageSize(1024, 1024);
igo.Quality = OpenAI.Images.GeneratedImageQuality.Standard;
// generate the image requested
var image = imageClient.GenerateImage(
prompt: Prompt,
options: igo
);
If you've some experience of coding in C# it's reasonably easy to see what this code is doing, but I found it hard to find any documentation online about the structure of the OpenAI add-in's namespaces.
The OpenAI API will store images for a couple of hours only, so the onus is on you now to save the image you've created. To do this, first get its website address:
// get the URL to this image
string imageUrl = image.Value.ImageUri.AbsoluteUri;
You can now save this image. One way to do this - and I confess I got ChatGPT to recommend this - is shown below:
// images last for about 2 hours, so save this
using (HttpClient client = new HttpClient())
{
// need to call async method to get image
HttpResponseMessage response = client.GetAsync(imageUrl).Result;
if (response.IsSuccessStatusCode)
{
byte[] imageBytes = response.Content.ReadAsByteArrayAsync().Result;
string filePath = Server.MapPath(@"~/special/customimages/");
string fileName = $"i{customImageRecord.SpecialCreateImageId.ToString()}.webp";
var imageFolder = new System.IO.DirectoryInfo(filePath);
System.IO.File.WriteAllBytes(filePath + fileName, imageBytes);
}
}
Notice that you have to use an async method to get the image from the website. Obviously the lines setting the file path and file name will be different for your application, but everything else could stay the same.
The above code is as basic as I could make it. Here are two obvious improvements you could make:
Improvement | Explanation |
---|---|
Add error-trapping | What happens if your users request more than 5 images in a minute, taking you over the API limit? Or if their prompts make no sense, or violate decency, or (worse still) copyright? |
Use async calls | In my case I wanted the screen to pause until an image was returned, but you might want to use async calls in your controller to allow other tasks to run at the same time. |
If you've read all of this thinking "but why didn't he do this in Python?", the answer is that I did; but I couldn't find an easy way to call a Python script from within ASP.NET MVC!
Some other pages relevant to the above blog include:
Kingsmoor House
Railway Street
GLOSSOP
SK13 2AA
Landmark Offices
99 Bishopsgate
LONDON
EC2M 3XD
Holiday Inn
25 Aytoun Street
MANCHESTER
M1 3AE
© Wise Owl Business Solutions Ltd 2025. All Rights Reserved.