Flappy Bird in Excel VBA - Basic Workbook Setup
Useful Links
Return to the Flappy Bird in Excel VBA Tutorial index.
Download Flappy Owl Pt2 - Basic Workbook.
Introduction
This part of the tutorial explains how to setup a basic workbook ready to start coding our Flappy Owl game. I'll be using the 32-bit edition of Excel 2010 for this blog but it should be easy to port the game to work in more modern versions of Excel.
I'm going to assume that you don't know a huge amount about VBA already and, as I have the luxury of space, I'll try to explain things in reasonable detail. This means that if you do already know a lot about VBA you'll probably feel a little patronised. I will cover a few techniques that we haven't covered before in any of our blogs or videos, so you may still learn something!
If you don't want to bother with doing the basics yourself you can just download the basic Flappy Owl workbook instead. It's probably worth giving this page a quick read so that you're happy with what's been done.
If you're interested in learning Excel VBA from a more serious perspective we've written a complete Excel VBA tutorial just for you.
Creating the Macro-Enabled Workbook
The first task is to create a macro-enabled Excel workbook, just as you would if you wanted to add VBA code to a boring ol' business spreadsheet. The easiest way to do that is to open Excel or, if Excel is already open, press CTRL + N on the keyboard.
Once you've done that, either click the Save button on the toolbar or just press CTRL + S on the keyboard.
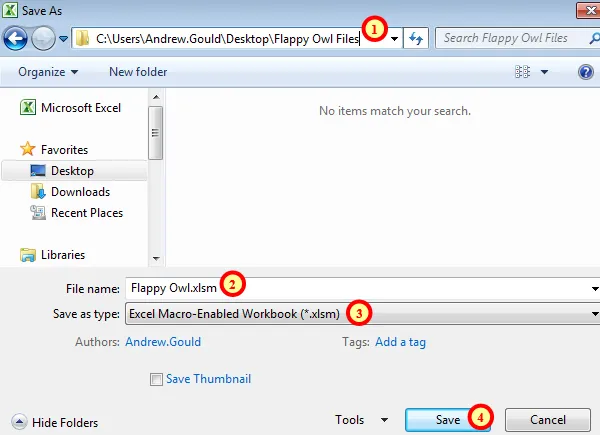
Complete the dialog box as described below.
To save the workbook:
Select a folder in which to save the file.
Give the file a sensible name.
Select Excel Macro-Enabled Workbook from this list.
Click Save.
Creating the Game Worksheets
For the time being we only need two worksheets in the workbook, so if you're working in Excel 2010 or earlier, delete all of the sheets except for Sheet1 and Sheet2.
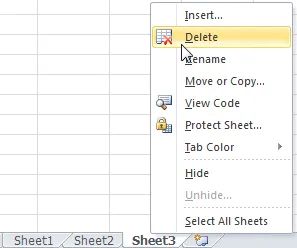
Right-click on the tab of the sheets you want to delete and click Delete.
If you're working in Excel 2013 you'll need to insert an extra worksheet. You can do this easily by clicking the New sheet tool at the end of the current sheet tabs.

Click the + symbol to insert a new sheet.
We'll also rename the worksheets. The quickest way to do this is to double-click on the tab, type in a new name and press Enter.

Call the two sheets Game and Test.
Renaming the Sheet Objects in VBA
When we start writing our game code it will be useful to have an easy way to refer to each worksheet in code. To give each sheet a sensible code name we can use the VB Editor. You can open this by heading to the Developer tab in the ribbon and clicking the Visual Basic button. The easiest way to get into the VB Editor is to press ALT + F11 on your keyboard.
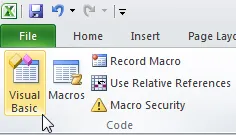
Click the Visual Basic button or press ALT + F11.
Once the VB Editor is open we can use the Project Explorer and Properties windows to rename our worksheets. These windows should appear on the left hand side of the screen. If they don't you can use the View menu at the top of the screen to display them. Alternatively, press CTRL + R to display the Project Explorer and F4 to display the Properties window.
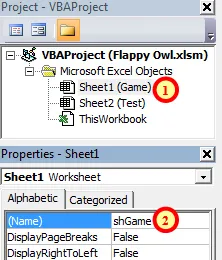
To give each sheet a code name:
The end result should be worksheets with both sensible tab names and code names.
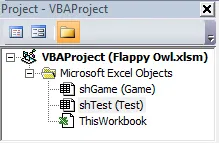
The end result should look something like this.
We could also rename the VBAProject object in the same way, but as we won't be referencing any other VBA projects from this one we don't need to do this.
Changing Some VB Editor Settings
Before we start writing any code there are some settings of the VB Editor that are worth changing. From the menu choose Tools | Options...
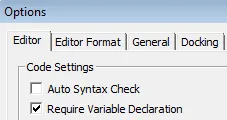
Uncheck the box next to Auto Syntax Check.
Unchecking the Auto Syntax Check option means that we won't see annoying pop-up messages when we make syntax errors. Checking the Require Variable Declaration option means that we have to declare all of our variables and will also help to spot other typing mistakes. You can read more about this in our blog on declaring variables in VBA.
Setting the Dimensions of Cells
We're going to treat the cells of the worksheets as the pixels of our game. At the moment our 'pixels' are a little on the large side so we need to resize them. We'll only do this on the Test sheet for now.
Resizing rows and columns manually is probably the easiest way to do this. Head back to Excel by pressing ALT + F11 and then click on the cell selector tool in the top left corner of the Test sheet.
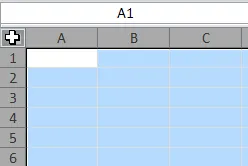
Click in the top left of the sheet to select all of the cells.
Now you can click and drag between any two columns to change the width of all of the columns on the sheet.
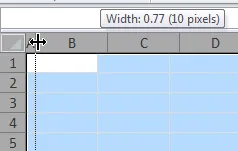
Click and drag the column width to set it to 10 pixels. The other number, 0.77, is the number of characters that can be displayed in the default font of the Normal style of the workbook. This may be different for your workbook.
You can do the same thing to change the row height to 10 pixels.
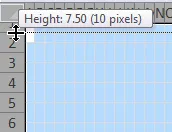
Click and drag to change the row height to 10 pixels. The second number, 7.50, is the height in points. Note that this is different to the column width.
Hiding Gridlines
When the game runs we don't want to see the gridlines of the worksheet so let's turn them off. Head to the View tab in the ribbon and uncheck the Gridlines box.
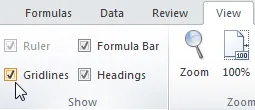
Uncheck this box to hide the gridlines on this worksheet.
The end result should be a blank page consisting of very small cells (although they'll get even smaller before the end) - exactly what we need to start programming our game.
Inserting a Module into a Project
To begin adding code we need to head back to the VB Editor and insert a module into the project. You can do this from the menu by choosing Insert | Module or by right-clicking somewhere in your project:
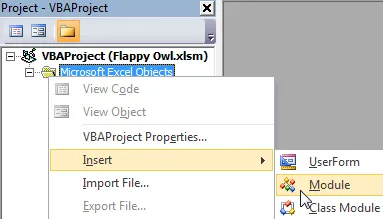
Right-click anywhere in the project and choose Insert | Module.
When the module has been created you can rename it in the same way as you renamed the sheet objects earlier.
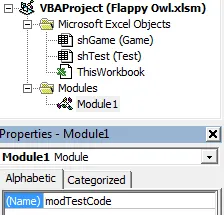
Select the module and change its (Name) property in the Properties window.
You should see the words Option Explicit at the top of the module. If you don't you'll have to type them in yourself. It's then worth checking your VB Editor settings as described earlier on this page.

If these words don't appear at the top of the module just type them in yourself.
Writing a Subroutine
We'll start by writing a single procedure to setup some basic game parameters. Start by creating a subroutine which goes to the test worksheet and colours in some cells. You can either write this code out yourself or just copy and paste it into your own module.
Option Explicit
Sub TestGameCode()
Dim BirdCell As Range
Dim FloorRange As Range
shTest.Select
Range("A1").Select
Cells.Clear
Set BirdCell = Range("R5")
Set FloorRange = Range("A40:Z40")
BirdCell.Interior.Color = rgbCornflowerBlue
FloorRange.Interior.Color = rgbBlack
End Sub
If you're using Excel 2003 or earlier you won't be able to use the rgb colour constants I've used here. Instead you could replace these with vbBlue and vbBlack.
When you've finished writing the procedure you can run it. To do this, click somewhere between the Sub and End Sub lines and either click the Run tool on the toolbar or just press F5 on the keyboard. When you switch back into Excel this will be the amazing result:
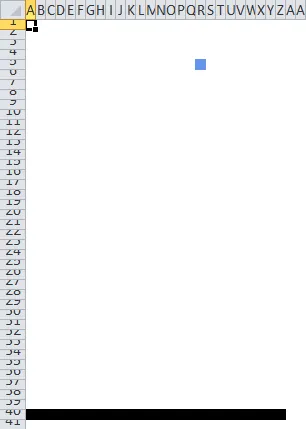
Believe it or not, this will eventually become our version of Flappy Bird.
The blue square represents our bird while the black line represents the floor. Obviously it's not much of a game at present, but we have our starting point.
What's Next
That's it for the basic workbook and worksheet setup. Next we're going to start writing some code to create our basic game timing loop, but first you'll need to learn something about the Windows API.


