As a quick checklist before you start writing code, in the previous part of
this lesson you should have already:
- Opened Excel and created a new workbook.
- Opened the VBE by choosing Developer | Visual Basic
from the Excel ribbon or pressing Alt
+ F11.
- Created a new module in the VBE by right-clicking in the
Project Explorer and choosing Insert | Module.
Your screen should resemble the one shown below:
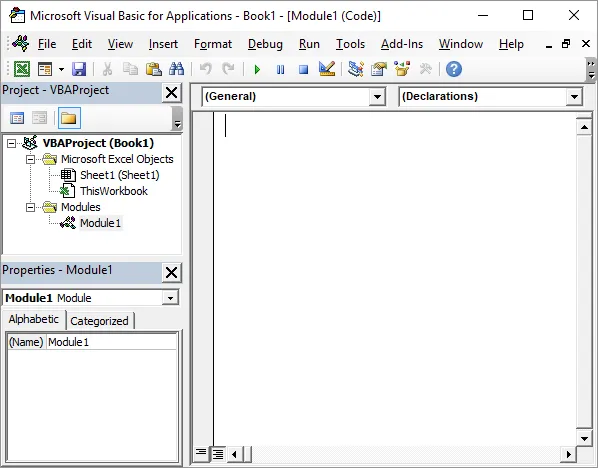
This is the starting point for this part of the lesson.
Creating a Subroutine
You create code in VBA by writing a list of instructions that you want your
application to carry out. The instructions you write need to be contained
within a procedure. VBA has several types of procedure but we'll
be sticking with the simplest type, called a subroutine.
You can begin a subroutine by writing the word sub followed
by the name you want assign to it:

You can't use spaces in the names of things in VBA. Here we've used underscores
instead, but you can also just omit spaces altogether.
There are several other rules you must follow when assigning names to things
in VBA. You can see a list of these rules in the Reference
section of this module.
After entering the name of your subroutine, press Enter
to create it. You should see several things happen:
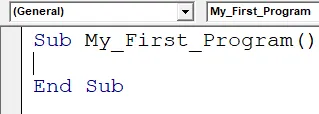
The VBE will add a set of parentheses after your subroutine's name and add the
End Sub line for you.
Code Layout and Comments
You can now write the instructions of your program between the Sub
and End Sub lines. You may find it helpful to use blank
lines and indenting to make your code easier to read. Press Enter
to create a blank line then Tab to indent the
cursor one tab space:
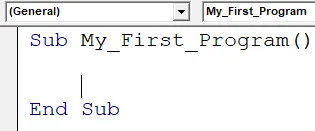
You don't need to lay out your code like this, but it does make life easier when you have to read or edit your code later!
Before writing an instruction it can be helpful to add a comment which describes
what your code is doing. You can add a comment by typing '
(an apostrophe) followed by any text:
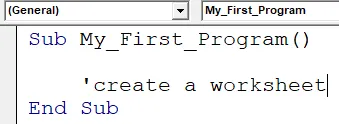
You don't need to add comments but it will help to remind you what you did when you read your code later.
Complete the comment by pressing Enter at the end
of the line:
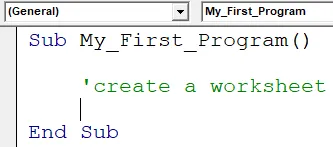
Comments are displayed with a green font colour in the VBE.
Writing Simple VBA Instructions
Now you're ready to write an instruction that your program will carry out when
you choose to run it. Most instructions in VBA follow a pattern in which
you start by referring to the thing you want to manipulate (an object
in VBA speak) and then either apply an action (a method) to it or alter
an attribute (a property) of it. You separate the object from the
method or property with a full stop (or period). The basic syntax is shown
in the example code below:
Object.Method
Object.Property = something
In our example, the object we want to manipulate is called Worksheets,
and we want to create a new item by using its Add method.
Start by writing the word worksheets at the beginning of the
instruction:
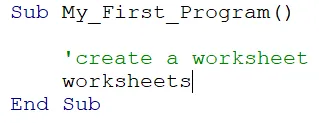
It doesn't matter whether you use upper case or lower case letters.
Now type a full stop (period) to see a list of things you can do to the object:
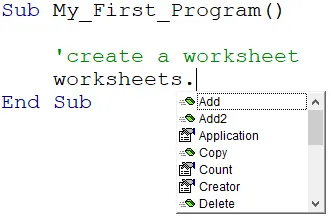
Typing a full stop makes the
IntelliSense list appear. This list shows the methods and properties of the object you have referenced.
You can select an item from the IntelliSense list by either:
- Typing it out.
- Double-clicking it with the mouse.
- Selecting it with the cursor keys and pressing either:
- Tab to remain
on the same line; or
- Enter to move
to the next line.
Whichever technique you choose, press Enter at
the end of the line to complete your first instruction:
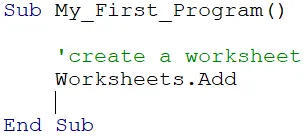
The VBE will capitalise words that it recognises automatically.
When we finally run the subroutine, this instruction will create a new
worksheet and automatically select it in Excel.
You can attempt to display the IntelliSense list at any stage by pressing Ctrl
+ Spacebar or Ctrl
+ J. Try doing this at the start of an
empty line.
Press Enter to create a blank line and then
add a new comment as shown below:
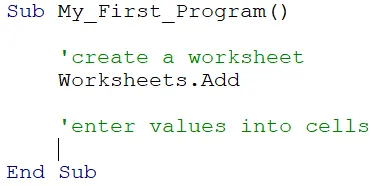
Type an apostrophe followed by some text as shown, then press Enter.
For the next instruction we'll change the Value property of a
Range object. To make sure that we modify only one cell
we must specify the address of the one we want to change. Start the
instruction by typing the word range followed by an open
parenthesis character (.

The tooltip that appears indicates that you can specify which cell you want to reference.
Enter the cell reference of the cell you want to change inside a pair of
double-quote characters, followed by a close parenthesis. In our example
we'll reference cell A1:

It doesn't matter whether you use upper case or lower case letters here.
Next, type a full stop and look for the Value property in the
IntelliSense list:
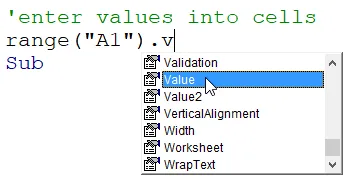
You can type the entire word, or just part of it before selecting it from the list.
Now we need to assign a value to the property. For this example, we'll
enter our name into the cell. To do this, type an =
sign followed by your name enclosed in a pair of double-quotes. Press Enter
at the end of the line:

Literal text in VBA must be enclosed in double-quotes. Feel free to use your own name!
For the next instruction we'll enter the current date into cell A2.
Start by referring to the Value property of this cell:

Type an = sign after referring to the
Value property.
Now we want to
calculate the current date. To do this, press Ctrl
+ Spacebar and look for the Date
keyword in the IntelliSense list:

Using the
Date keyword means that VBA will calculate the current date at the point the code is executed.
Press Enter at the end of the line to complete
the instruction:

The completed instruction.
For the final instruction in this subroutine, we'll apply some formatting to the
two cells whose values we've changed. Start by creating a blank line
followed by a new comment:
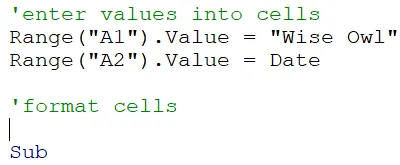
Remember that blank lines and comments are optional.
You can refer to a block of cells by entering two cell
references separated by a colon character (:).
We then need to refer to the Interior property
of those cells:

Enter this code and select the
Interior property from the IntelliSense list.
Now we need to refer to the Color property of the interior of
the cells:

UK users should
be careful of the spelling of
Color!
We can now assign a value to the Color property. Type an =
sign, followed by the letters rgb and press Ctrl
+ Spacebar:

You can pick from a wide range of elaborately-named colours!
Press Enter at the end of the instruction and
your first subroutine is finished!
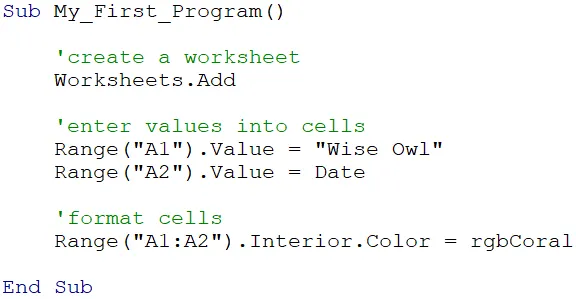
The finished subroutine should look something like this.
The next part of this lesson will show you how to save your code before you run
it.


