SQL Server Management Studio is a great tool for writing queries to return a set of information from a database, but it's absolutely hopeless at formatting the results! If you need to tidy up the results of a query you'll need some way to extract or export them and this blog explains a few of the techniques you can use to do precisely that.
Changing the Output of a Query
Normally, when you execute a query in Management Studio the results appear in the grid at the bottom of the screen.
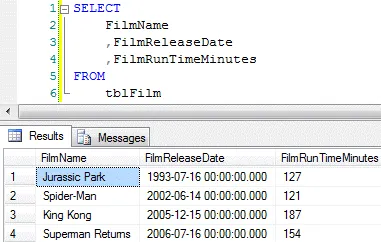
The grid is the standard view for displaying query results.
You can change the output of a query using a set of three buttons on the Edit SQL toolbar at the top of the screen.

The first three buttons shown in this screenshot allow you to change the output type of your query.
You can also change the output style of a query by right-clicking anywhere within your query and choosing the option shown in the diagram below:

Right-click within the query and choose Results To, followed by the output type that you want.
Once you've changed the output type you'll need to execute the query again in order to see the changes.
Sending Query Results to a File
If you choose Results to File from the list of query output types, the next time you run the query you'll be prompted to save a file which will contain the query results.

The default file type is Report files with an .rpt extension.
The files generated by this query output type are designed to be used with Crystal Reports for Microsoft Visual Studio.
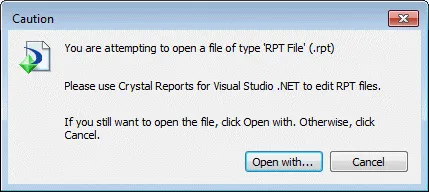
This is the message you'll see if you attempt to open the file by double-clicking on its icon.
Of course, this type of output is only useful if you're using Crystal Reports to format your query results! What if you wanted to use a different tool, such as Microsoft Excel, to create reports? Perhaps the most flexible way to export the results of a query is to execute it and then either save or copy the results.
Copying Query Results
Once you've executed a query you can use the Results panel at the bottom of the screen to choose what to do next. The first step is to make sure that you've selected all of the results!

Click the top left corner of the grid to select all of the results.
Once you've done this you can right-click in the same place and choose what to do next.
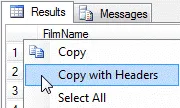
You can choose Copy to get just the records or Copy with Headers to include the column headings.
All that remains is to paste the copied results into another application. In the example below we're pasting the results into an Excel workbook:
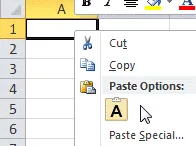
There are many ways to paste in Excel - here we've right-clicked on a cell but you could also choose Home > Paste from the ribbon, or just press CTRL + V on the keyboard.
Now you can format the results to your heart's content.
Saving the Results of a Query
Rather than copying and pasting the results of a query, you could just choose to save them into another file.
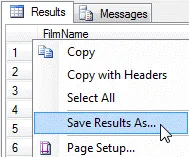
Right-click the top left corner of the grid and choose the option shown here.
You can choose between two different file types when saving the results of a query, as shown in the diagram below:

The default choice is CSV (Comma delimited). Here we're choosing Text (Tab delimited) as some of our film names contain commas.
Opening a Text File in Excel
Once you've saved the file you can open it in another application. In Excel you can press CTRL + O on the keyboard to choose to open a file. The diagram below shows what to do next:
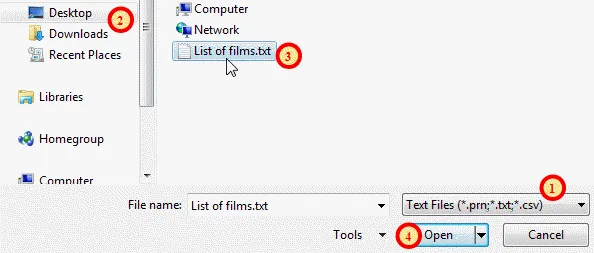
The numbered steps are described below.
Choose the type of file you want to open.
Browse to the location in which you saved the file.
Select the file.
Choose to open it.
In Excel, performing the above steps will launch a wizard which leads you through the process of opening a text file. In the first step you should say that your file is delimited rather than fixed width, as shown below:

Choose the option shown here then click Next.
In the next step you can choose which character delimits the columns in the output of the query.

In Management Studio you can create comma-separated value files, or tab-delimited files. Tick the box which matches the type of file you created.
In the final step of the wizard you can set basic formatting options for the columns you have imported.
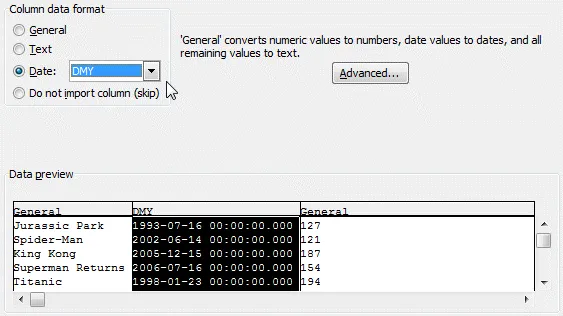
Click in a column at the bottom of the screen and choose the formatting option from the top. Here we're formatting the film release dates as dates.
Once your file is open you can format it in any way you like.
SQL Server Management Studio has a wizard to help you export data from a database, although it's a little long-winded to use compared to the options described in the first two parts of this series.
Preparing to use the Export Wizard
The wizard that you use to export data in SQL Server assumes you have already created a location for the data to be exported. In our example we'll use Excel as the export location, which means that we need to create and save an Excel workbook.

Give your workbook a sensible name and make sure to close it after saving it.
Launching the Export Wizard
You can start the wizard by right-clicking the name of your database in the Object Explorer window and choosing the options shown in the diagram below:
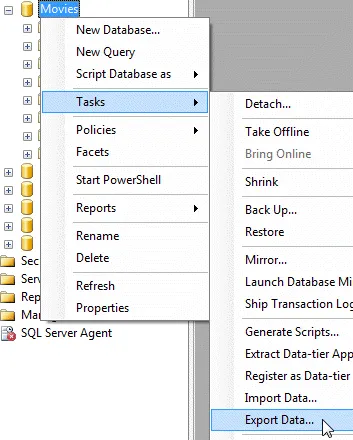
Right-click the database then choose Tasks > Export Data...
By default, the first page you'll see when you launch the wizard explains to you that you've just launched the wizard! You can happily click Next to get to the useful part of the process.

Check this box if you'd like to stop SQL Server informing you when you've started the wizard.
Choosing a Data Source
The first real step of the wizard asks you where your data is going to come from. The options are reasonably self-explanatory, as shown in the diagram below:
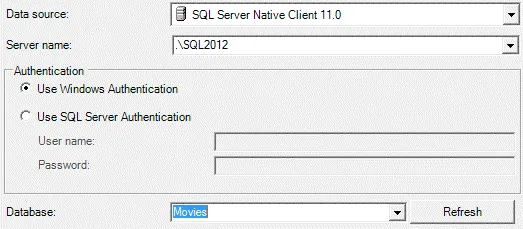
The options should be pre-selected to use the database whose name you right-clicked on to launch the wizard.
Click Next to move to the next step.
Choosing a Destination for the Data
The following step asks where you would like the data to go when it is exported.
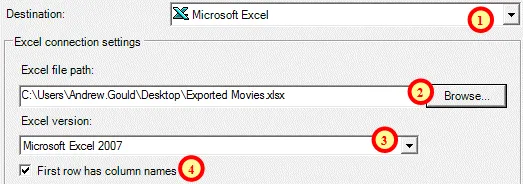
The options on this page will be different depending on the type of destination you select. The numbered steps are described below.
Choose the type of destination. This could be another SQL Server database, an Access database, a text file, or an Excel workbook.
Click here to locate and select the file your data will be exported to.
For Excel you can choose which version you are using. Excel 2010 users should select the option shown here.
Check this box if you took the time to add column headings to the Excel file you created earlier.
Click Next to move to the next stage.
Choosing the Data to Export
The next step is to choose exactly which data you want to export. You can do this by selecting from the tables and views stored in the database, or by writing a query.
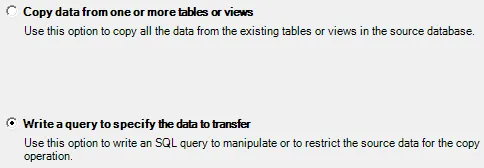
Select one of the options.
If you choose to get your data from tables or views you'll be presented with a set of check boxes for selecting exactly what data you want.
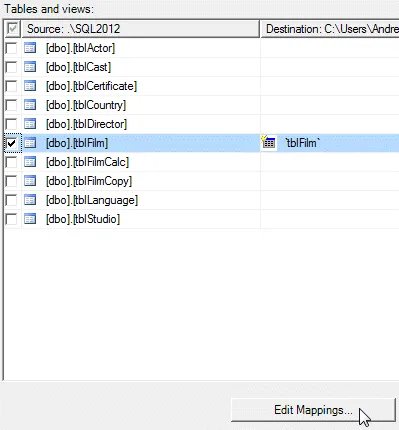
Check the box next to the tables you want. You can click Edit Mappings... to control what gets exported in more detail.
If you chose to write a query to export the data you'll be presented with a basic text box in which you have to write a valid query without the aid of IntelliSense.
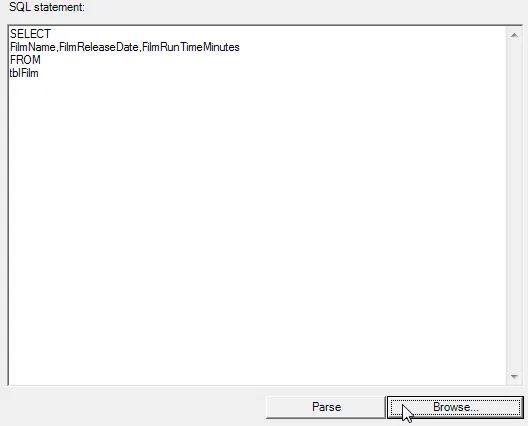
You can't even press TAB to indent your code! Clicking Parse will check that your query is valid. You can also click Browse... to open a query that you have previously saved.
Editing Export Mappings
After writing a query and clicking Next you will have the opportunity to click Edit Mappings... to control in more detail what gets exported.
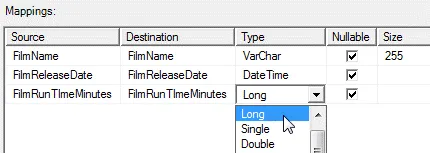
This dialog box allows you to choose the data type of each of the exported columns.
Exporting the Data
The final step of the wizard allows you to choose whether to run the export immediately and/or to save the export steps in an SSIS Package to be run at a later time.
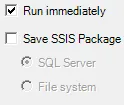
Here we're choosing to run the export immediately without saving an SSIS package.
Saving an SSIS package means that when you want to perform the same export in future you don't have to go through the entire wizard again! You can learn much more about Integration Services on our two-day SSIS course.
Click Finish to perform the export. You should be shown a list of tasks being performed, as shown below:
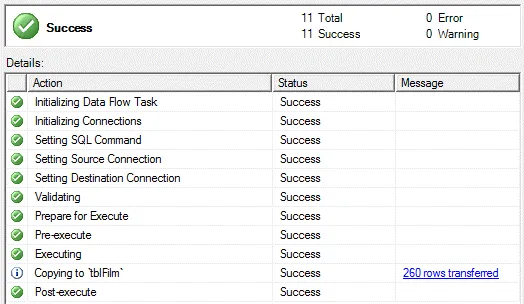
A successfully completed export.
Checking the Results
All you have to do now is open the destination file to ensure that all of your data is there.

You may find that you have to spend some time tidying up the data that has been exported.
Is the Export Wizard Worth It?
If you're only performing a one-off export the export wizard is not really worth using, especially as it's so much easier to copy and paste query results. If you're going to perform the same export many times however, the ability to save a reusable SSIS package is incredibly useful.


