Read our blogs, tips and tutorials
Try our exercises or test your skills
Watch our tutorial videos or shorts
Take a self-paced course
Read our recent newsletters
License our courseware
Book expert consultancy
Buy our publications
Get help in using our site
551 attributed reviews in the last 3 years
Refreshingly small course sizes
Outstandingly good courseware
Whizzy online classrooms
Wise Owl trainers only (no freelancers)
Almost no cancellations
We have genuine integrity
We invoice after training
Review 30+ years of Wise Owl
View our top 100 clients
Search our website
We also send out useful tips in a monthly email newsletter ...
Written by Andy Brown
In this tutorial
The easiest way to create a view is through the view designer. The rest of this page shows how to use this.
The view designer is a great way to start a query off and get your joins right, but if you want to link to tables in other databases, include complicated calculations in a view or add comments to it, you'll need to switch over to scripting your view (as described in the next part of this tutorial).
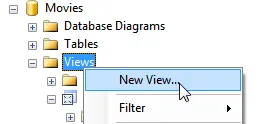
To do this, first choose to create a new view:
Right-click on the Views category and choose to create a new view.
You can now choose upon which tables the view should be based.
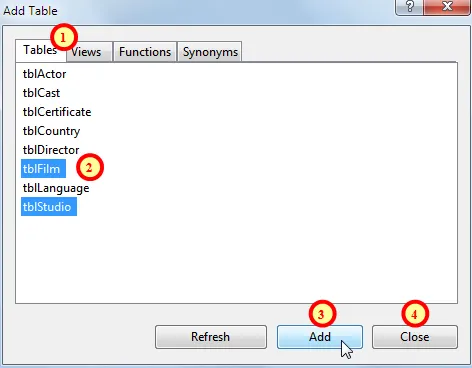
Choose which tables you want to include in your view:
Choose whether you're basing your view on tables, or on other views.
Choose the tables (you can use the CTRL key to select more than one table at the same time).
Click to Add the tables to your view.
When you've finished, click on the Close button to remove this Add Table dialog box.
These steps are shown in this diagram:
Add tables to your view by following the numbered steps above.
You can speed things up by double-clicking on each table that you want to include, then by pressing ESC to get rid of the dialog box.
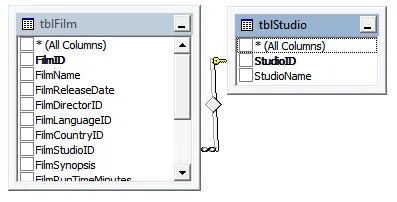
If SQL Server knows that there is a relationship between the tables that you've added, it will show it:
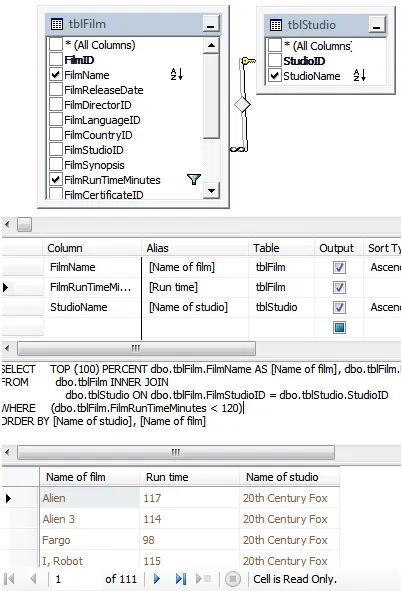
Here there is a relationship between the films and studios table in the underlying database, so this appears in the view designer.
If the relationship didn't appear, you could add it in by clicking on a column in one table, and dragging it onto the corresponding column in the other table (then releasing the mouse button).
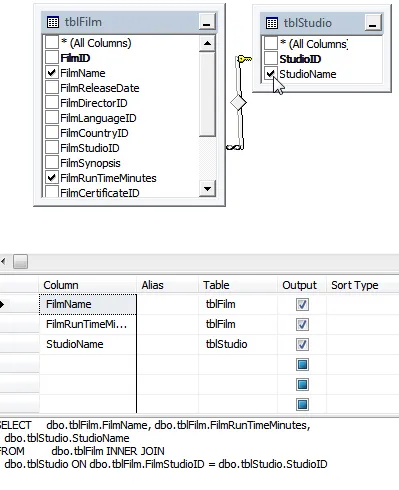
You can now tick the columns that you want to include in your view:
Here we've ticked 3 columns, to show the film name, the run time in minutes and the studio name. You can see that SQL Server is creating the SQL query for you at the bottom of the window.
If you want to give your columns aliases (alternative names), just type these in:
You don't have to type the square brackets - SQL will add these for you.
To sort data, just choose Ascending or Descending for any column:
Here we're sorting by the studio name, then by the film name (the numbers 1 and 2 give the priority order for sorting).
You can type in any valid SQL criteria in the Filter columns:
Here we're showing all films lasting less than 2 hours.
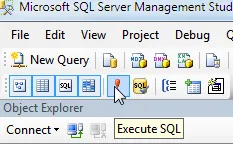
If you want to see what rows your view would return, click on the ! button:
Click on this red exclamation mark tool to run your view and see the results.
You should now be able to see the rows returned by this view at the bottom of your window:
This view has returned 111 rows. The view window is split into 4 parts.
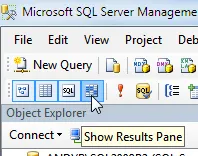
If you can't see the results, it might be that they're not visible. You can hide or display the 4 parts of the view window listed above using these 4 tools:
These 4 tools hide or display each part.
However, it's probably a good idea to keep all parts of the view window visible.
You can save your view in most of the usual Windows ways. For example:
Click on this tool, or press CTRL + S.
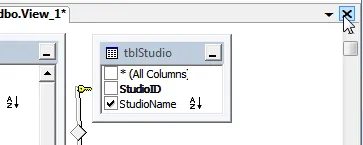
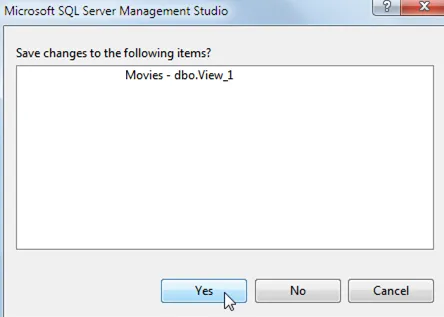
Alternatively, you could close it down, and Management Studio will ask if you want to save your changes:
Click on this cross to close down your view.
Confirm that you want to save your view:
Click Yes to confirm that you want to save your view.
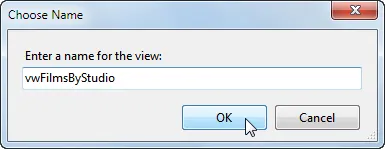
Give your view a name, and choose OK:
By convention, view names typically start with vw, to distinguish them from tables.
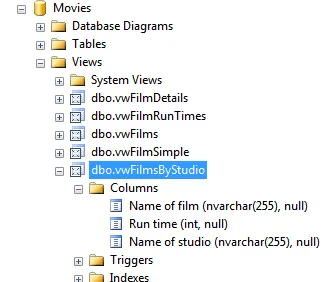
Your view name should appear in your list (occasionally you may have to right-click on Views and choose Refresh to update the list):
The new view in the list of views (you can expand the view to show what columns it includes).
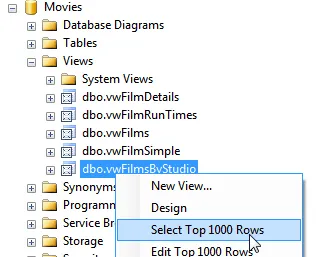
You can right-click on any view to show what rows it returns:
The exact menu option depends on the version of SQL Server Management Studio that you're using.
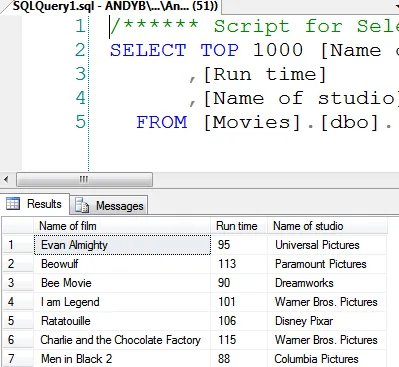
You can now see the results of selecting all of the rows from your view:
The first 7 of the 111 rows returned by this view.
So that's how you create a view in design view - the alternative would be to script a view.
You can learn more about this topic on the following Wise Owl courses:
Kingsmoor House
Railway Street
GLOSSOP
SK13 2AA
Landmark Offices
99 Bishopsgate
LONDON
EC2M 3XD
Holiday Inn
25 Aytoun Street
MANCHESTER
M1 3AE
© Wise Owl Business Solutions Ltd 2024. All Rights Reserved.