It's all very well drawing a pretty user form, but you then need to get it to interact with Excel! That's what this tutorial is all about. You can also read:
Running a User Form from the Code Window
Seeing what a form will look like is easy: just click on the form background to activate it first, then press the F5 key or click on the Run tool:
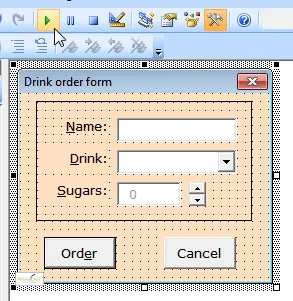
Here we're about to click on the green triangular play tool to see what the form looks like.
Unless you've attached code to any of the buttons, the only way to close down your form will then be to click on the cross at the top right:
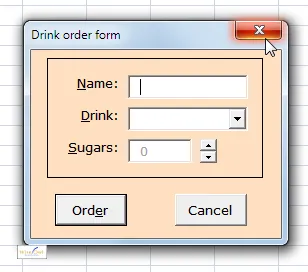
In an ideal world the Cancel button would work too!
Running a Form from a Macro
A more likely scenario is that you'd want a user to run your form when they open a workbook or click on a button:
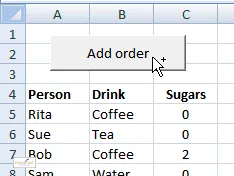
You can attach a macro to this button so that when a user clicks on it, your form appears.
To reach this situation you need to write a macro in a separate module. Here's how this could read:
Option Explicit
Sub ShowForm()
Load frmDrink
frmDrink.Show
End Sub
This macro has to be in a separate module because the ShowForm procedure above has to be publicly exposed. Routines that you write within a form are private to that form, and nothing else can see them.
The Difference between Show/Hide and Load/Unload
The order of events for a form is as follows:

The order of events for a form is shown here.
The main reason that the order of events above is important is that the Initialize event for a form will only run when it loads: so if you hide and then redisplay a user form, any code attached to the Initialize event won't run.
Now we've seen how to run a form, it's time to look at getting the buttons to work - and for that we need to look at form events.
The Importance of Naming Controls
The first thing you need to do to code a form is to make sure the bits you want to code have got sensible names:
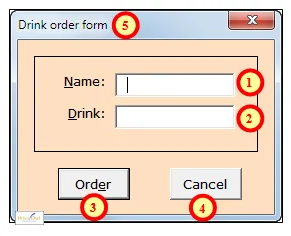
We'll call the controls txtName, txtDrink, cmdOrder, cmdCancel in the numbered order, and call our form frmDrink.
This naming convention - using the first 3 letters of a name to denote what sort of a thing it is - is called Modified Hungarian notation. Using this convention, I would be owlAndy.
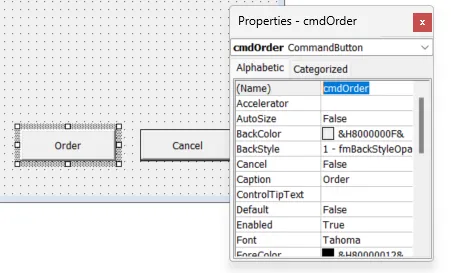
Renaming the Order command button, for example, is shown here (you just change the Name property, which appears at the top of the list of properties).
Attaching Code to Events by Double-Clicking
The easiest way to attach code to an event for a control is to double-click on it:
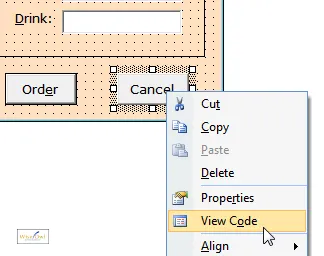
You can right-click on any object and choose to view its code, or (more simply) just double-click on it.
The UserForms application will automatically assign code to the Click event for this object (ie control what happens when you click on it):
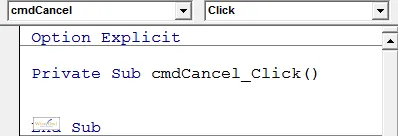
By default Excel assumes you want to assign code to the click event of a button.
Typically you would close a form when a user clicks on a Cancel button:
Private Sub cmdCancel_Click()
Unload frmDrink
End Sub
When you double-click on the background of the form itself, you get the Click event for the form, which isn't that useful.
Choosing Controls and Events to Assign Code to
Rather than relying on double-clicking on a control to assign code to it, you can use the code window. Here, for example, we assign code to the double-click event for the Cancel button:
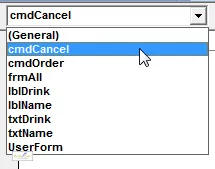 | 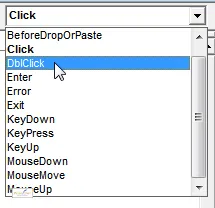 |
Choose the control on the left ... | ... then its event on the right. |
You could write code in the resulting event-handler (that's what the macro which react to events are called) as follows:
Private Sub cmdCancel_DblClick(ByVal Cancel As MSForms.ReturnBoolean)
Cancel = True
MsgBox "Double-clicking is only supported in the paid version."
End Sub
Note that in this case there wouldn't be much point, as I can't double-click without first clicking, and I've set clicking on the Cancel button to close the form!
Moving between Code and Form
You can double-click on a form to return to its design, or right-click:
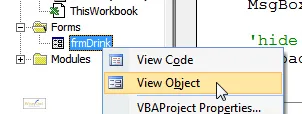
To edit a form, right-click on the form name and choose to view it as an object, or just double-click on the form name.
However, the easiest way to move between a form and its code is probably to press one of the following keys:
Key | What it does |
|---|
F7 | To go to code view from a form's design |
SHIFT + F7 | To return to a form from its code |
Using Me to Refer to a Form
When you're writing code, you'll often want to refer to the current form. You can do this in several ways, but the easiest is as Me.
In VBA Me always refers to the current object within which you're writing code, be it the Excel workbook, Access form or report, Word document or PowerPoint presentation ... or current user form.
So the code attached to our Cancel button could read:
Private Sub cmdCancel_Click()
Unload Me
End Sub
However, the biggest advantage of using Me is that it enables autocompletion:
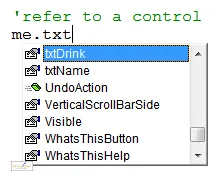
When you type me., the user forms application gives a list of all of the controls on the form. This makes typing code easier and safer.
A Typical Example - the Order Button
For our example, when a user clicks on the Order button we want to transfer the name and drink ordered for the person into a spreadsheet:
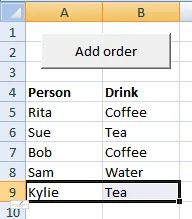
The results if Kylie orders a Tea.
Here is some code which would do this (note that for the moment we assume the person filled in the form correctly - in the next part of this tutorial we'll look at validating form data):
Private Sub cmdOrder_Click()
Worksheets("Orders").Select
Cells.Find("Person").Select
ActiveCell.End(xlDown).Select
ActiveCell.Offset(1, 0).Select
ActiveCell.Value = Me.txtName.Text
ActiveCell.Offset(0, 1).Value = Me.txtDrink.Text
MsgBox "Drink added!"
Unload Me
End Sub
What this macro does is:
finds the first blank cell;
sets its value to be the text typed into the txtName textbox; and
sets the value of the cell to its right to be the text typed into the txtDrink textbox.
Finally, the macro unloads the form, thereby closing it.
It's time now to look at validating data - what happens when your users aren't perfectly behaved.
To make user forms more robust, make extensive use of combo boxes to limit input options and spinner buttons to automate entry of numbers. The less freedom you give your user, the less code you'll have to write to validate their entries!
The BeforeUpdate and AfterUpdate Events for a Control
Imagine a user is filling in a form, and has just typed his or her name into a textbox called txtName. Suppose the user is about to press the Tab key to go onto the next textbox in a form. At this point the following events will happen for the txtName textbox:
Event | Notes |
|---|
BeforeUpdate | Occurs before the control value is "saved" |
AfterUpdate | Occurs immediately after the control value is saved, and the old value discarded |
Exit | Occurs when you leave the control |
However, you can interrupt the BeforeUpdate event if you're not happy with what the user typed in. For example, you may know that there are only 3 people working in your company who can use your form:
Private Sub txtName_BeforeUpdate(ByVal Cancel As MSForms.ReturnBoolean)
Select Case LCase(txtName)
Case "rita", "sue", "bob"
Case Else
MsgBox "No such person"
Me.txtName.SetFocus
Cancel = True
Exit Sub
End Select
End Sub
Every one of the 4 things we do if we find an error is vital:
Line of code | Heading 2 |
|---|
Displaying message | If there's a problem, you need to tell your user what it is! |
Setting the focus | There's nothing more annoying than a system which tells you you have an error in one place, and leaves your cursor flashing in another. |
Cancelling the event | If you don't cancel the BeforeUpdate event, the form will from this point on work with the new value, even though you've reported an error. |
Exiting the subroutine | You want to ensure that any other code in the BeforeUpdate validation code doesn't run. |
Choosing when to Validate - Form or Control Level?
The above example assumes that you validate each control as you leave it. Personally, however, I find this annoying, and I prefer to wait until I've filled in the entire form before being shown what I've done wrong. To do this, you could attach code to the Click event of the main button for a form. For our drinks order example, here's what this could look like:
Private Sub cmdOrder_Click()
If Len(Me.txtName.Text) = 0 Then
MsgBox "You must say who is ordering drink!"
Me.txtName.SetFocus
Exit Sub
End If
If Len(Me.cmbDrink.Text) = 0 Then
MsgBox "You must specify a drink!"
Me.cmbDrink.SetFocus
Exit Sub
End If
Worksheets("Orders").Select
This may all look fairly straightforward, but how about if the form includes the number of sugars: how do you then check this is a sensible number? Or indeed that it IS a number? Or how about the order date? Your validation can end up running to several screens of code. This is where advanced controls like combo boxes, spinners and the like come into their own!


